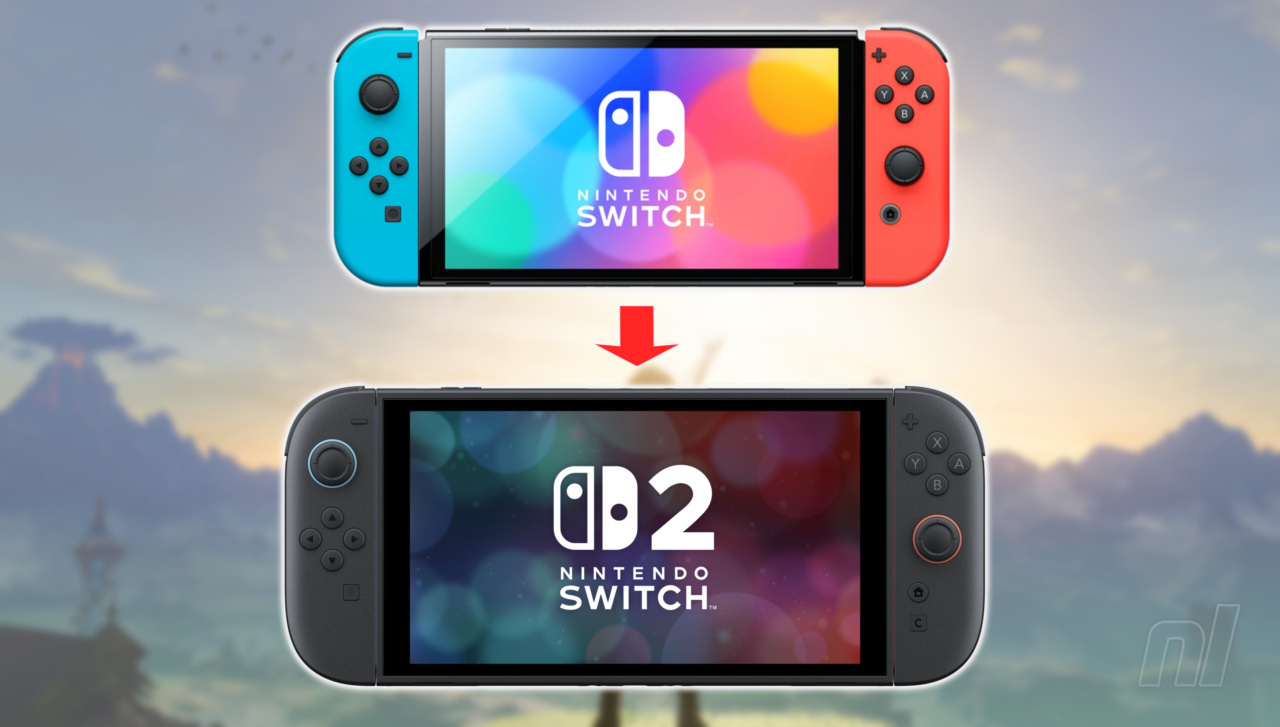
With Switch 2 being an evolution of Switch 1, Nintendo is making the transition between consoles as easy as possible. This means that backwards compatibility is a thing, with most of your existing games fully playable on the new console (with some notable exceptions, mind you).
So, how do you transfer everything from your original Switch to your new Switch 2? Well, that's what we'll cover in this guide.
Thankfully, you can transfer almost all of the data from your Switch 1 to your Switch 2, allowing you to move everything from full digital games to that fancy screenshot you took of BOTW's Great Plateau back in 2017.
Subscribe to Nintendo Life on YouTube834k
Switch 1 To Switch 2 System Transfer
To perform a full system transfer, you'll need the following:
- An original Nintendo Switch
- A new Nintendo Switch 2
- A Nintendo Account in which the same user is linked across the original Switch and the Switch 2
- A wi-fi internet connection
System Transfer: Step-by-Step Guide
Okay, so assuming you've got all of the necessary bits and bobs listed above, you're good to go.
- To start, you'll be prompted to perform a System Transfer when setting up the Switch 2.
- Select the relevant option to proceed with the transfer. At this point, you'll be prompted to insert a MicroSD Express Card, so be sure to do so if you have one – don't worry if you don't. Nintendo also gives a couple of pointers to let you know whether you've got the right type of card on hand.
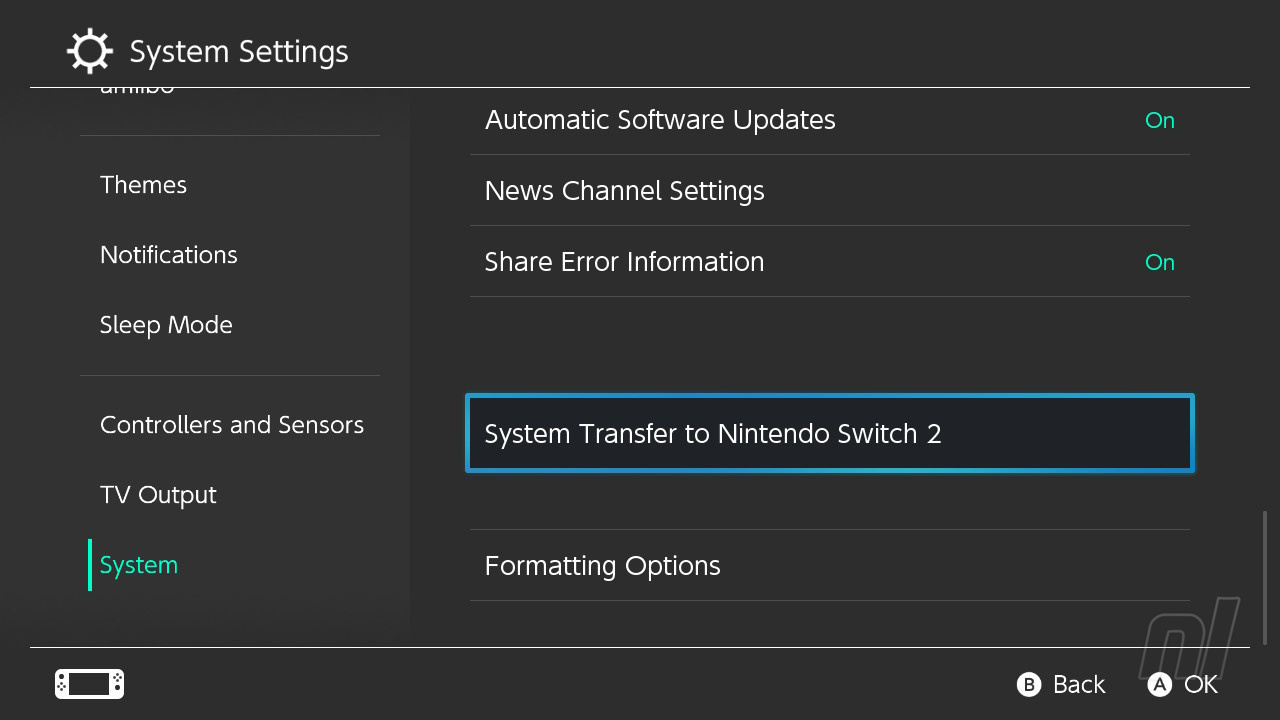
- Now switch (heh!) over to your Switch 1. Head into the Settings, navigate to 'System', and then 'System Transfer to Nintendo Switch 2'.
- You'll be given a warning regarding saved data - some games' saved data may be removed from the Switch 1 when transferred to Switch 2. Nintendo lists which specific games from your library this applies to. If you're happy, then proceed.
- On the next screen, you're told to keep the Switch 1 and Switch 2 consoles close together. When you're happy with this, you can move back over to the Switch 2.
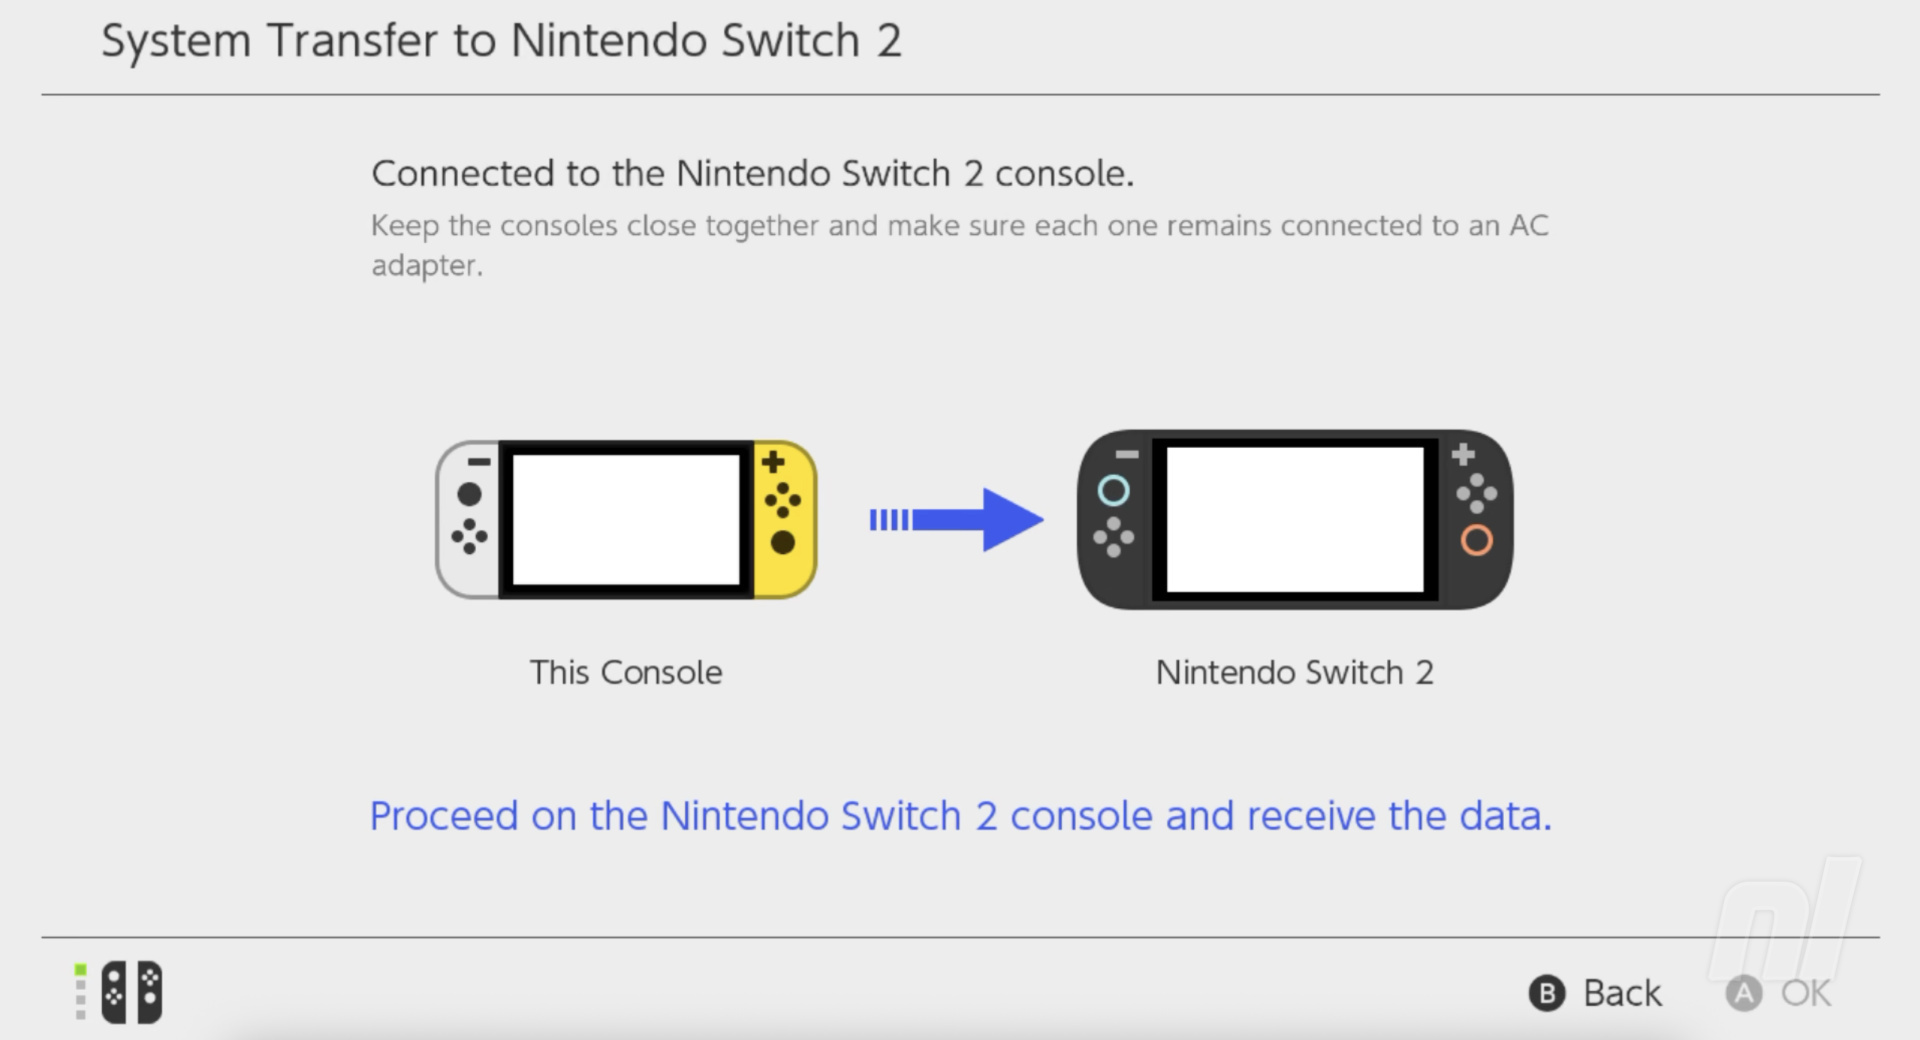
- On Switch 2, the next screen will reiterate that you should keep the two consoles close together (so do it!). When you're good to go, select 'Start Receiving Data'. The next screen will show a bar with how far along the data transfer is, with a rough estimate of how long you'll need to wait.
- Over on the Switch 1, you'll see a similar screen, albeit without so much information. Once the transfer is done, you'll see a message stating 'The data has been sent.'
- On the Switch 2, you'll see a similar screen upon completion of the transfer, noting that game downloads will take place later.
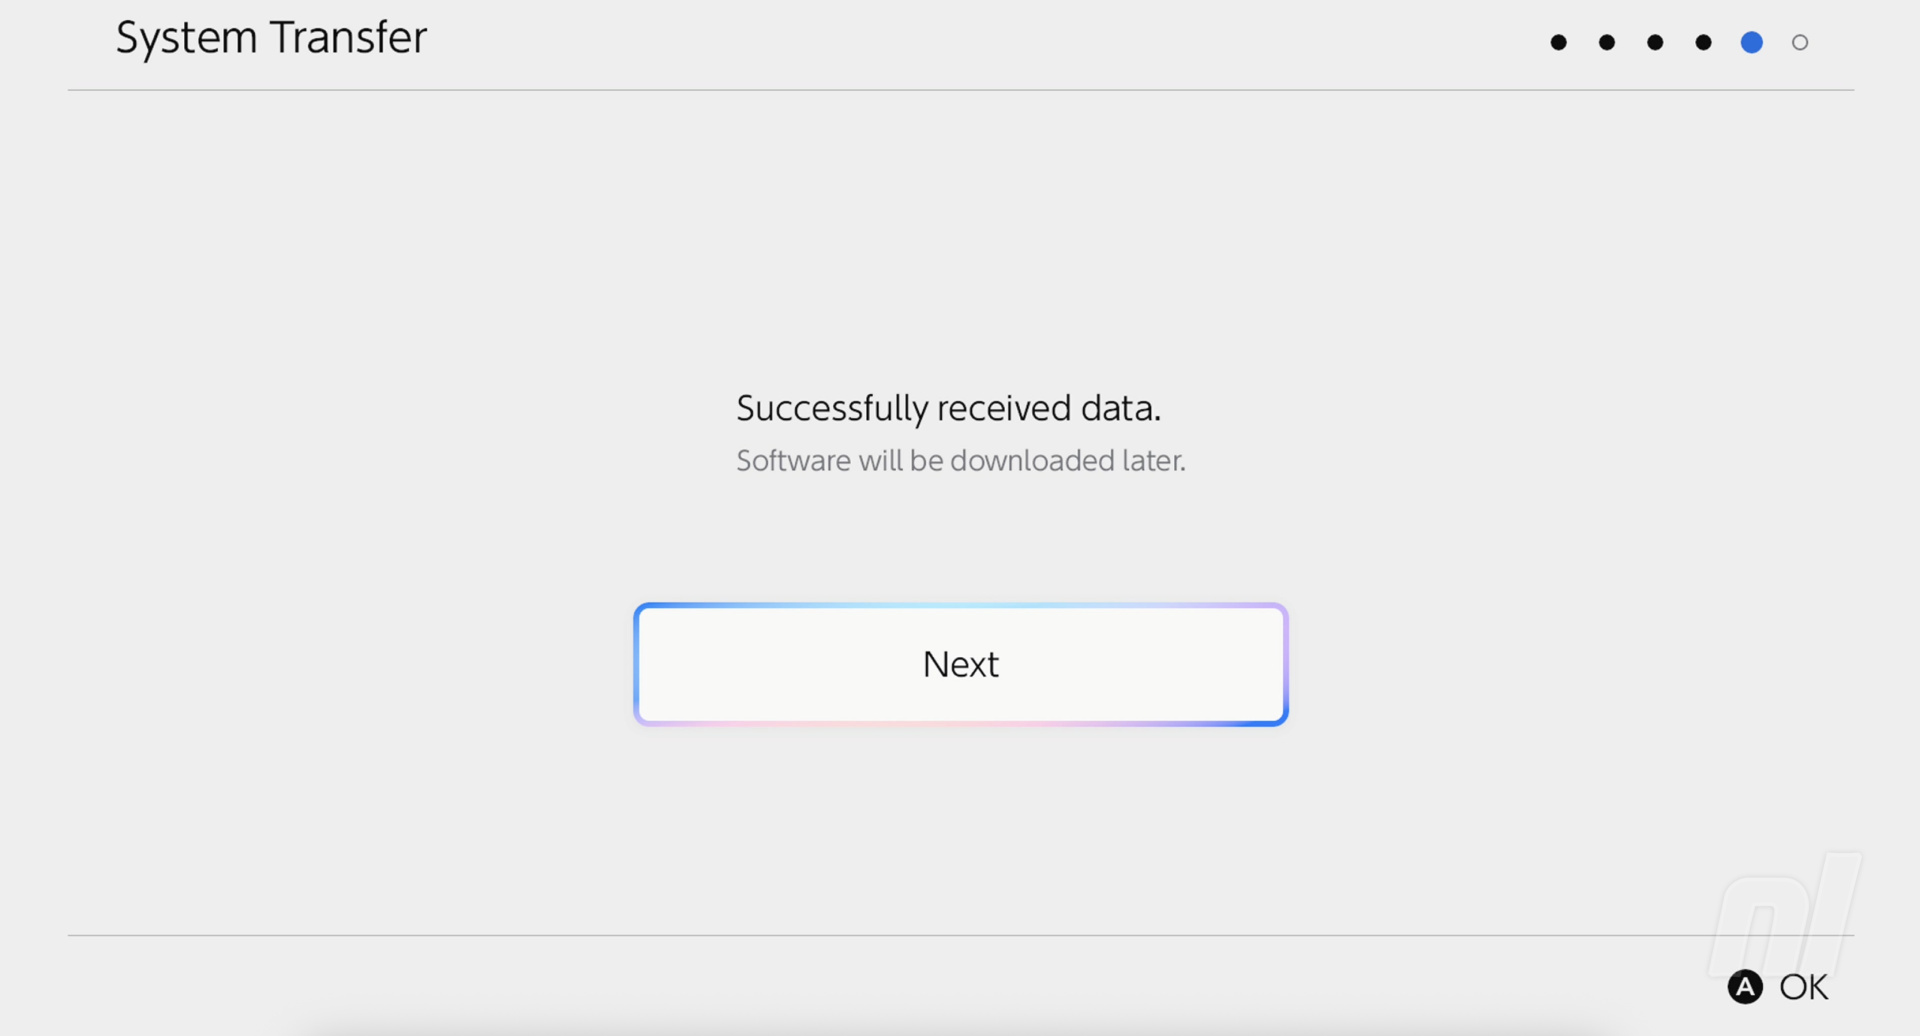
- You'll then be prompted to perform a transfer of any screenshots and videos you want to move from Switch 1 to Switch 2.
We'll update this guide with the full step-by-step instructions on how to do this soon.
What's included in the System Transfer?
When performing a system transfer, you'll be moving across all sorts of content and settings, including:
- Users (including Nintendo Accounts and accompanying Nintendo Switch Online membership)
- Purchased digital games
- Saved data
- Captured videos and screenshots
- Various system settings
- Parental controls
With the games, Nintendo has stated that they will redownload automatically on the Switch 2 after performing the system transfer.
This might take quite a while, depending on how many you have downloaded on your original Switch, so you may want to tidy up your game library before setting up the transfer.
Transferring console data to Nintendo's online server
If you happen to be getting rid of your Nintendo Switch before picking up a Switch 2 — whether it be down to a cheeky little eBay listing, a trade-in at GameStop, or simply handing it down to a family member — you can still perform the system transfer.
The console lets you transfer all the data detailed in the previous section to Nintendo's dedicated server. Then, once you obtain your Switch 2, you simply sign into the same user profile and retrieve the relevant data. Once you've sent the data to the server, your Nintendo Switch will revert to its factory settings.
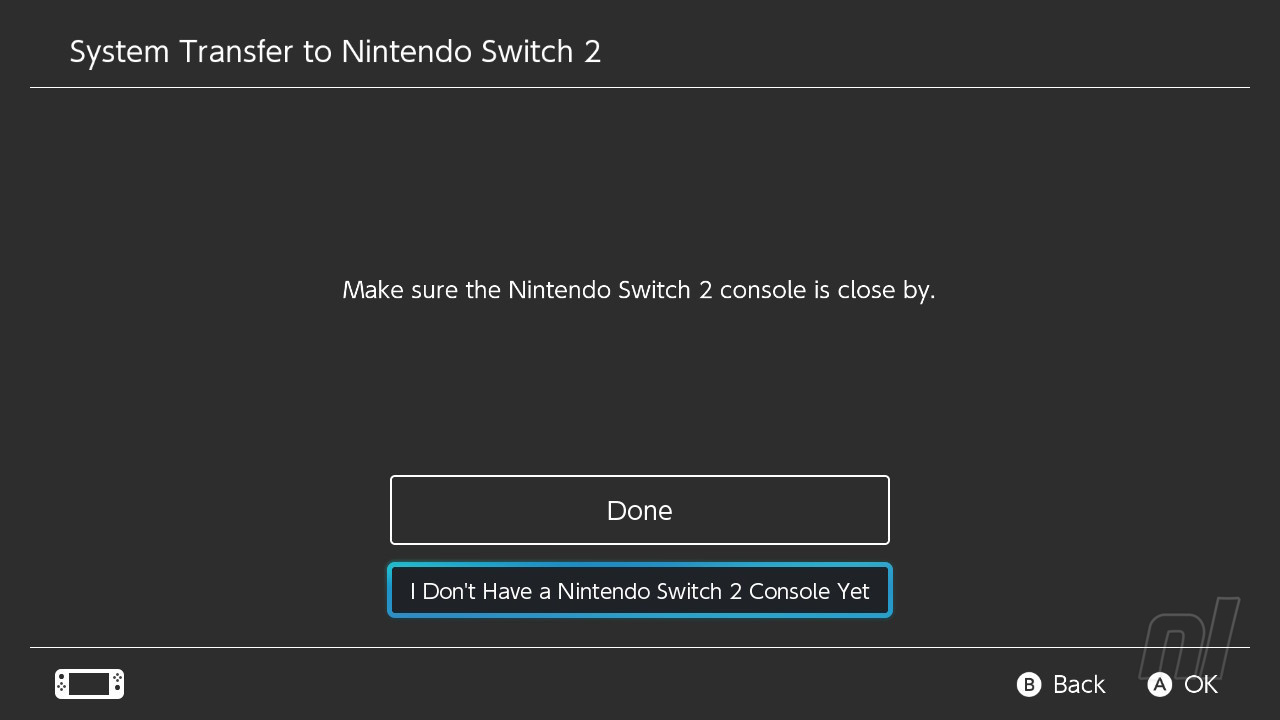
- To perform the transfer, head into the System Settings, scroll down to 'System', then choose 'System Transfer to Nintendo Switch 2'.
- Click through the next couple of pages until you see the option labelled 'I Don't Have a Nintendo Switch 2 Console Yet'.
- The next few pages will explain what happens during the transfer:
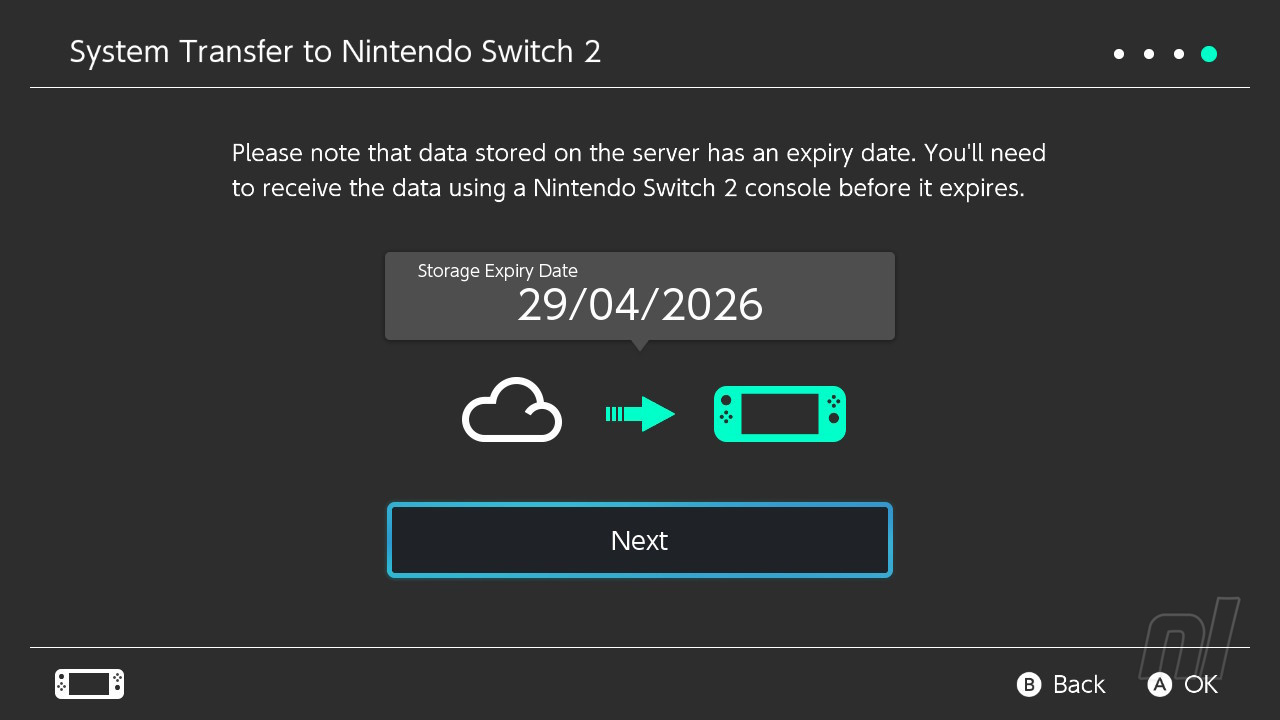
- Then, you'll be provided a date in which to finalise the transfer before your data is deleted from the server - make sure you complete the transfer before the expiry date shown.
- A final warning will show, so if you'd like to proceed, simply click 'Next'.
How long will my data stay on Nintendo's server?
Your data will only be stored in Nintendo's dedicated server for one year from the moment you perform the transfer. If you don't obtain a Nintendo Switch 2 console within that time, your data will be lost. Make sure you only perform the transfer if you know you'll be purchasing a Switch 2 shortly after.
So for example, if you start the process on 5th June 2025, your data will remain accessible until 4th June 2026.
Switch 2 System Transfer FAQ
But what does a system transfer entail? What games will be improved on the new console? Let's get answering those burning questions you might have....
Will my original Switch games be improved on Switch 2?
Only a select few will benefit from a free upgrade on Switch 2 after transferring them over from your original Switch.
Nintendo says that the upgrades will "improve playability" and implement the GameShare feature into select titles. Some games will get added resolution and frame-rate bumps, or additional HDR or Mouse Mode support.
Notable titles included in the list include Pokémon Scarlet and Violet, Super Mario Odyssey, and The Legend of Zelda: Echoes of Wisdom.
To see the complete list, check out our full guide: