Conifer may not be present in Hollow Knight: Silksong, but a new cartographer has taken his place. Shakra is a proud warrior and map-maker who is ready to fight — with both pen and sword.
Like in Hollow Knight, the cartographer is an invaluable NPC who you'll want to seek out early on in the game. Especially if you want to know where you are in the Kingdom of Pharloom. So we'll be covering where to find Shakra, how to get the Compass Tool, and how to fill out your map.
Subscribe to Nintendo Life on YouTube834k
Where To Find Shakra
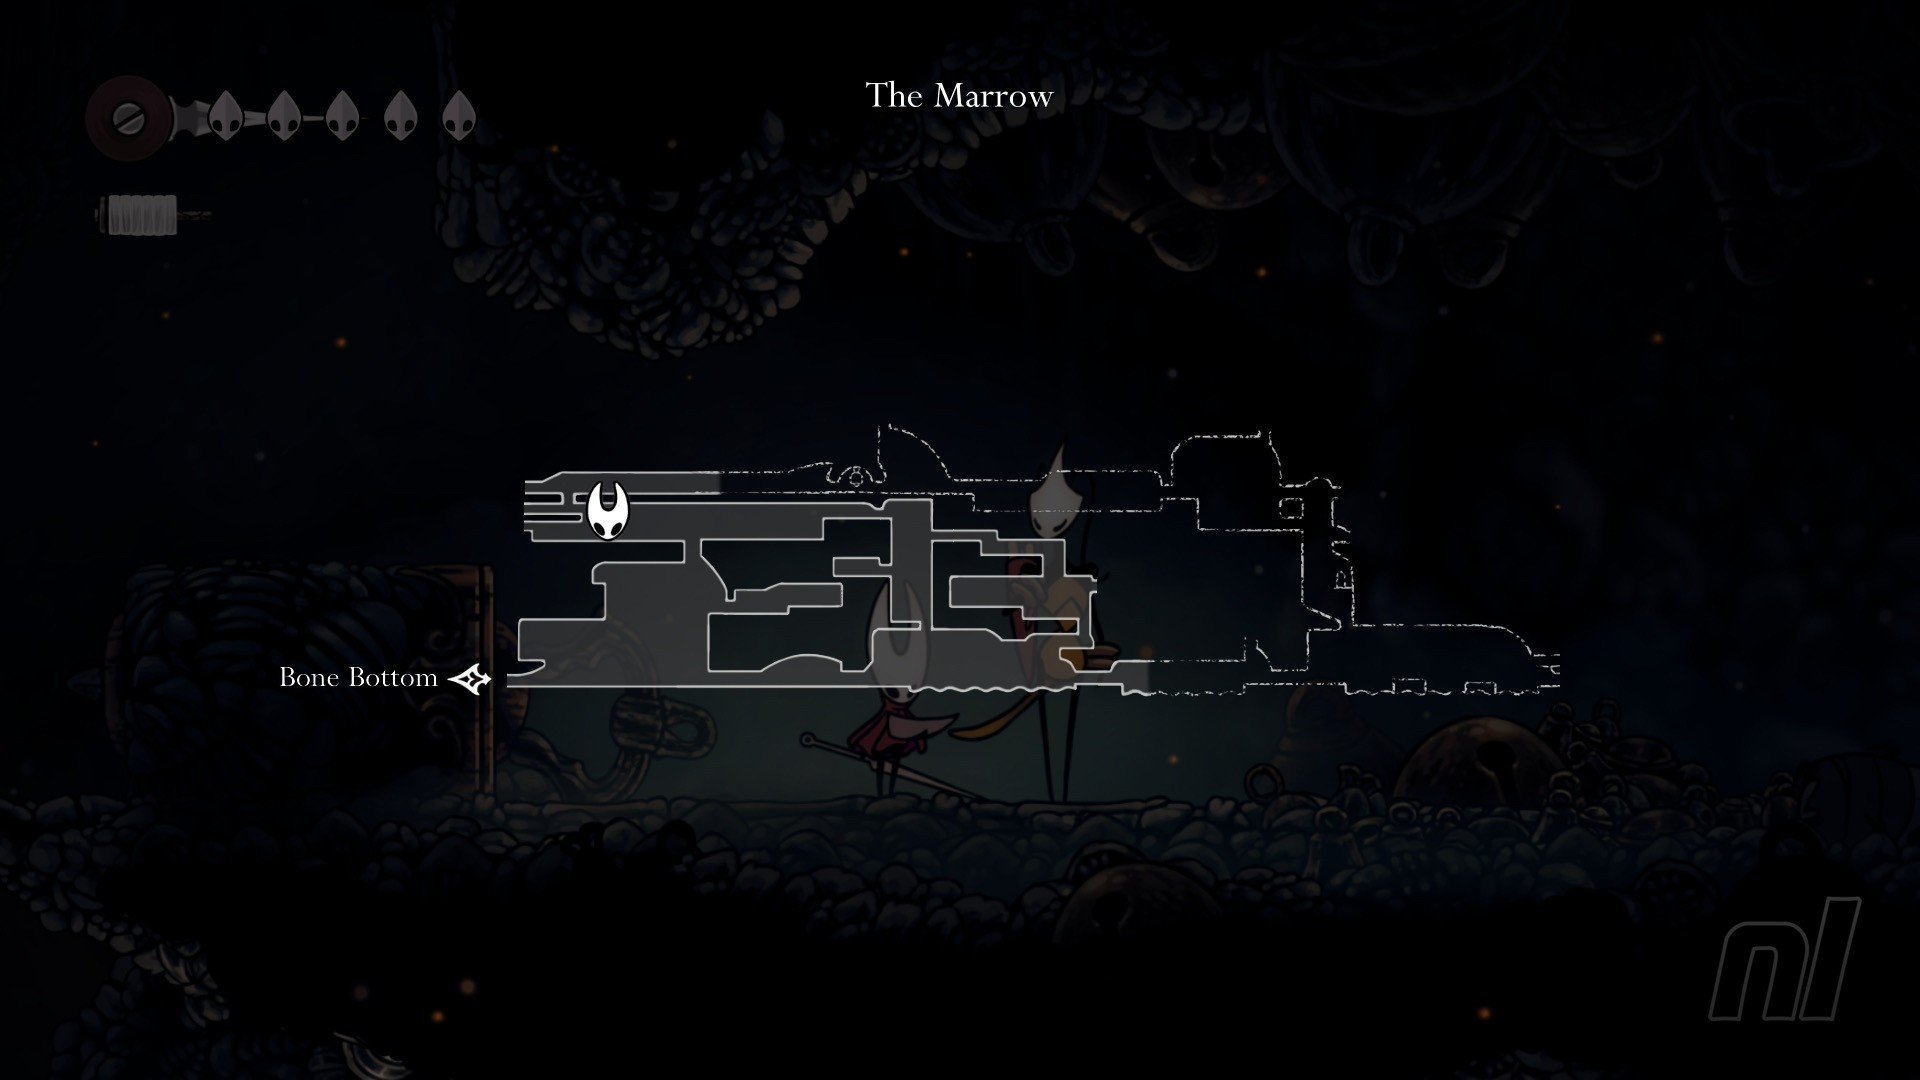
The first place you'll find Shakra is in The Marrow, which is the second major map in Silksong. It's only about an hour into the game, so it won't take you too long.
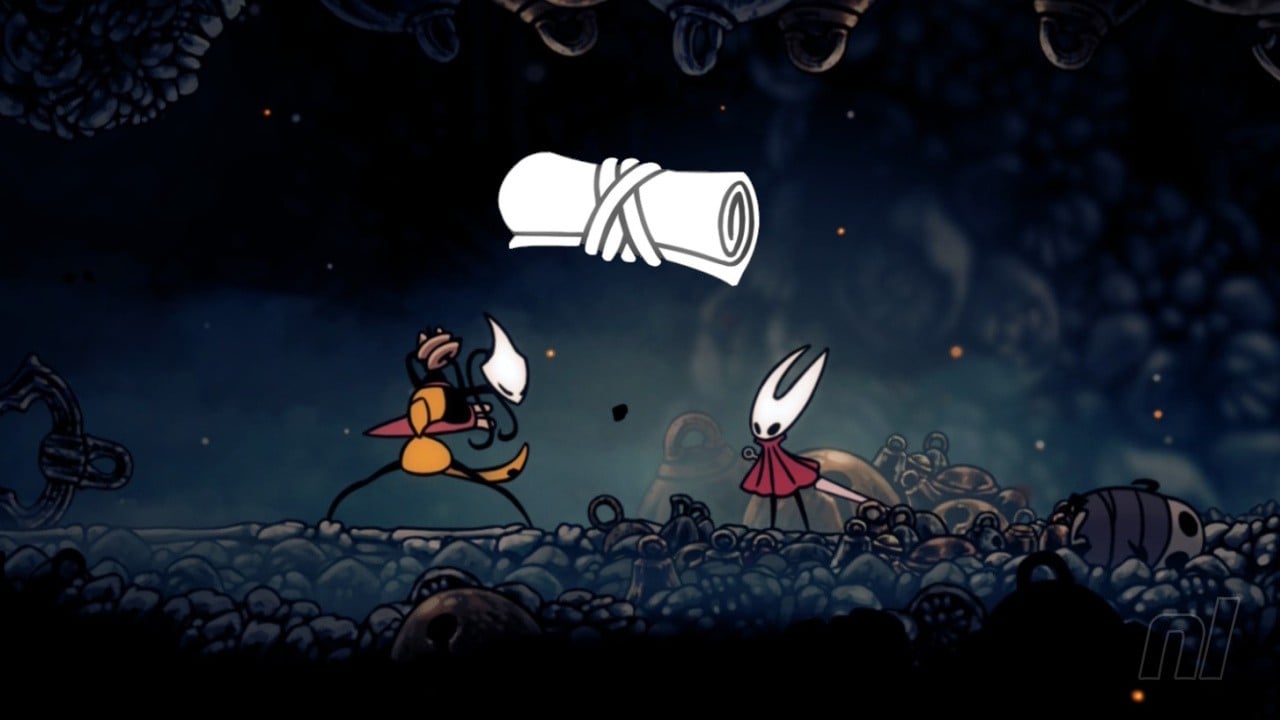
She's at the very end of a long corridor filled with enemies and cage platforms that you need to lower to progress. You'll know you're getting close to her because you'll hear her dulcet tones.
Once you find her, she'll draw her weapon — but don't worry! You won't need to fight her. She'll offer up her wares.
How to get the Compass
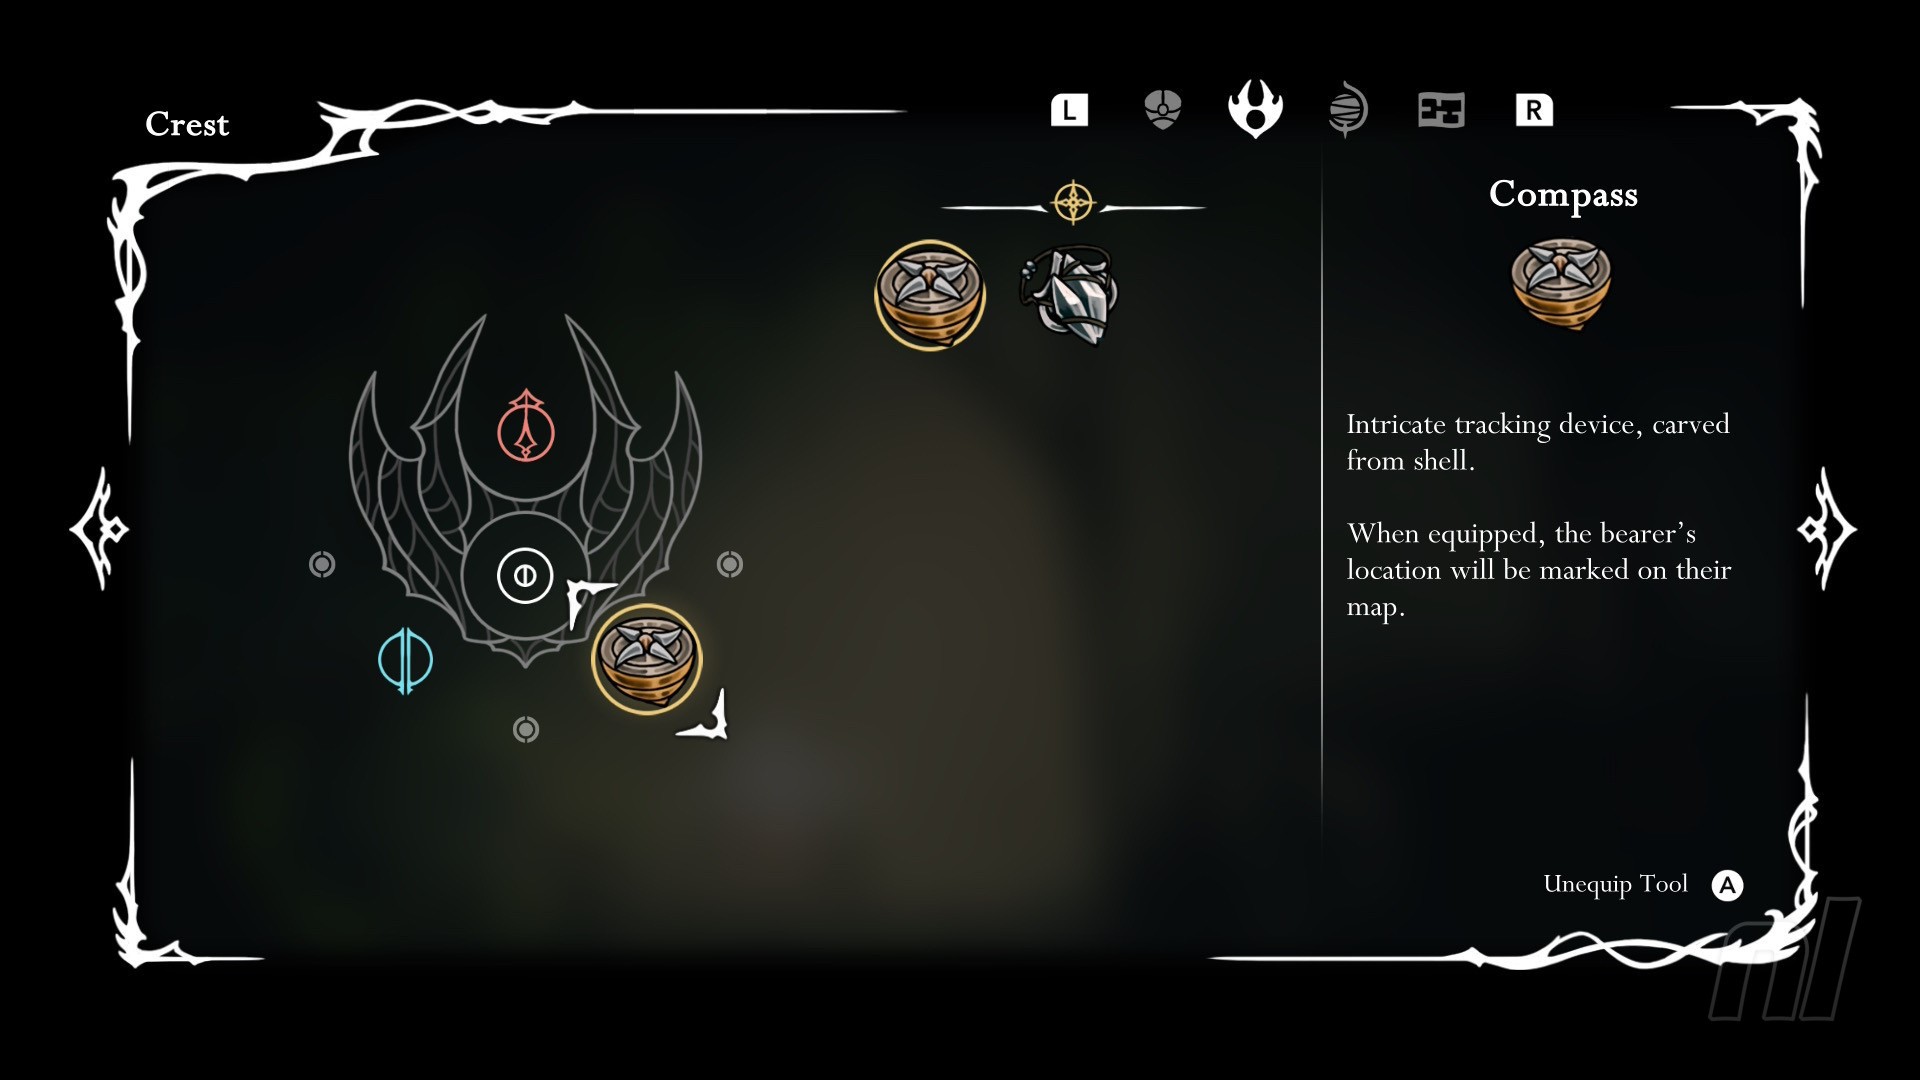
The Compass is the first thing you'll want to buy from Shakra — when equipped it will show you where Hornet is on the map.
Luckily, she sells this at The Marrow! It costs 70 Rosary, which you should have at this point. If not, you can head to the room left and below of Shakra and farm some beads from the enemies there. There's a path to a bench using this route, too, and it unlocks a gate just above Shakra.
Once you've bought it, all you need to to is equip it. It's a Yellow Tool, so you may need to swap out another Tool to equip it.
Should I buy the Compass or Quill first?
While it is more expensive, as we mentioned above, the Compass is one of the most valuable tools starting out.
The Quill will fill in any maps you've bought from Shakra as you sit down at benches. You don't need to equip it, as Hornet will scrawl these down automatically.
Essentially, the Quill helps makes your map more complete, but ultimately, knowing where Hornet is, is much more important in the early game.
All Shakra & Map Locations
Shakra will move all around Pharloom throughout the course of Silksong, so you'll see her pop up in multiple spots. Plus, there are other ways of finding maps as you progress beyond the underground and through The Citadel.
Here's the location of every single Map in Silksong.
We've highlighted the maps you need to buy from Shakra with an asterisk (*), as these are required to unlock the Trail's End Wayfarer Wish and get the Silk and Soul quest
Mosslands & The Marrow Map*
We've already mentioned this one! Shakra is towards the end of the long corridor in The Marrows. This is where you'll buy that much-needed Compass Tool.
- Mosslands Map Cost - 40 Rosaries
- The Marrow Map Cost - 50 Rosaries
Deep Docks Map*
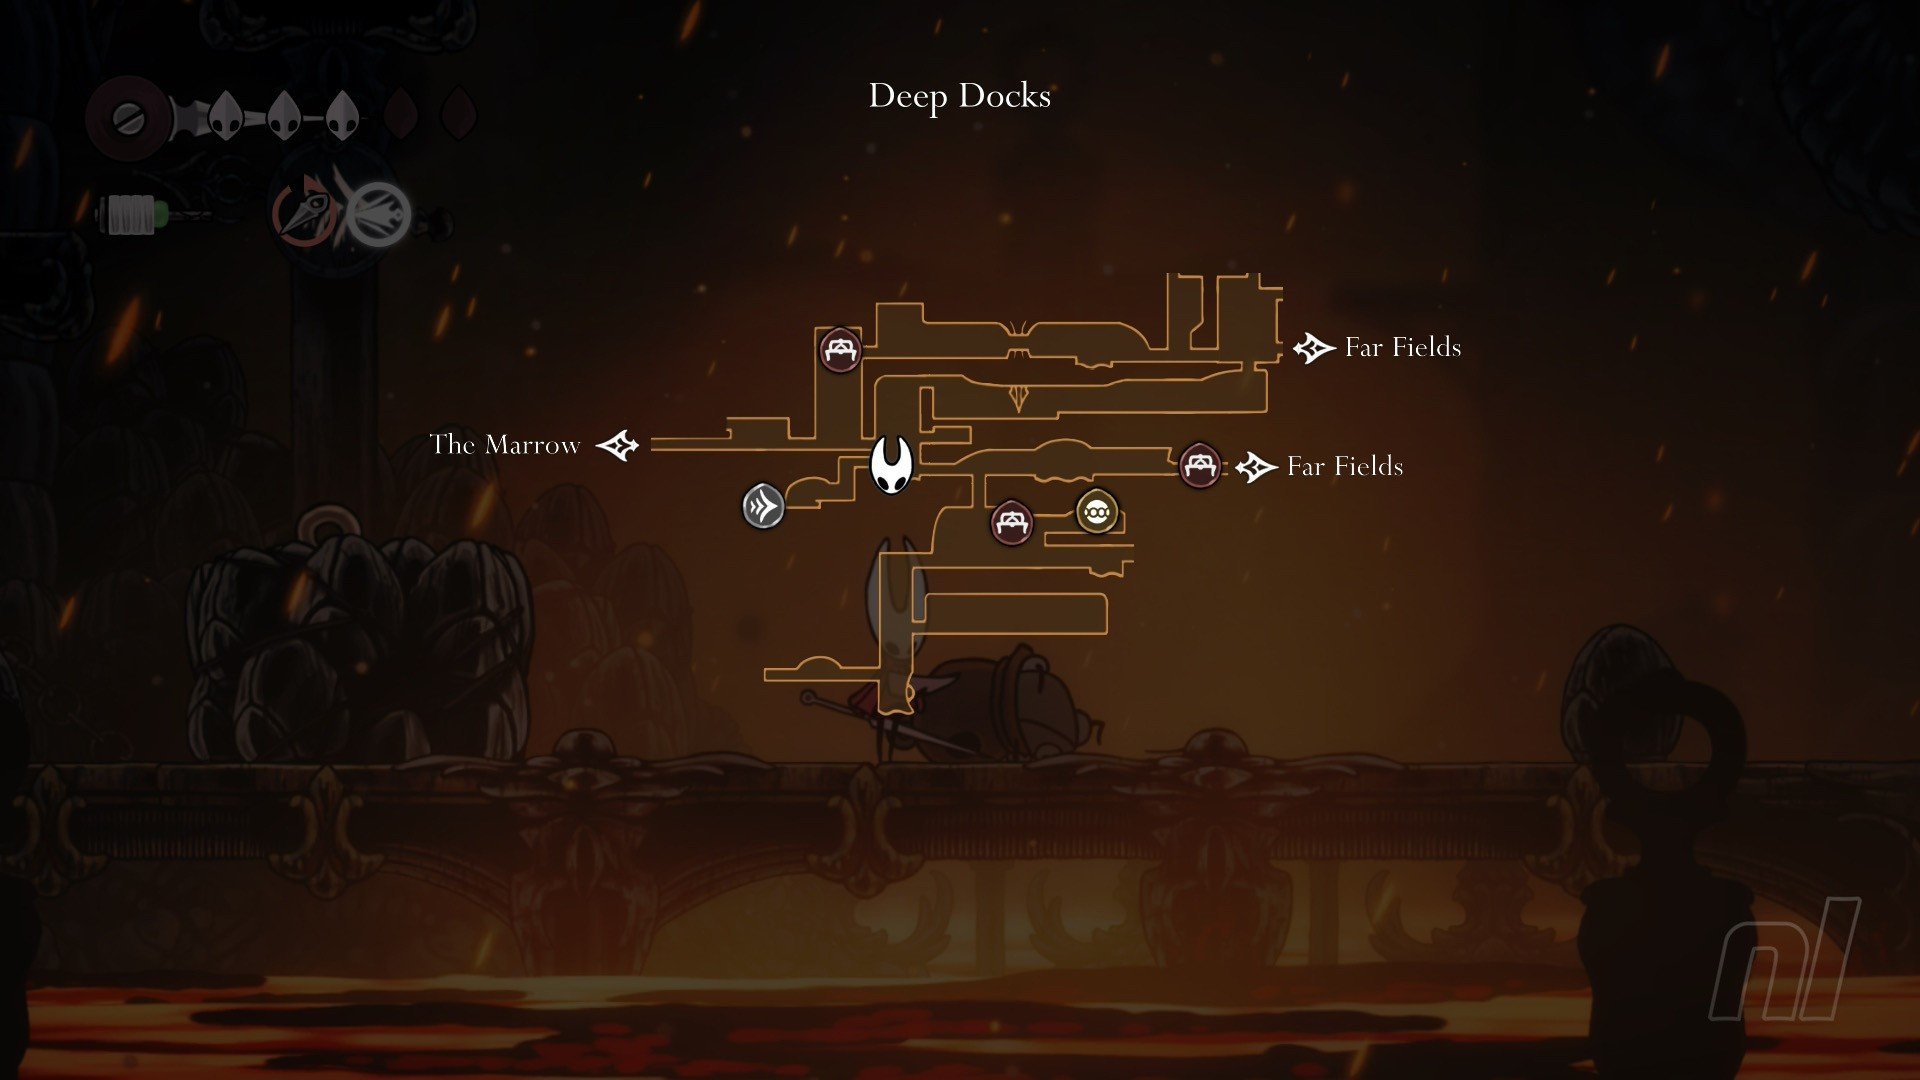
Once you enter Deep Docks, keep heading left, following the Bench signs as you go. Eventually you'll reach a large vertical room, where Shakra will be right below the Bellway.
- Deep Docks Map Cost - 50 Rosaries
Far Fields Map*
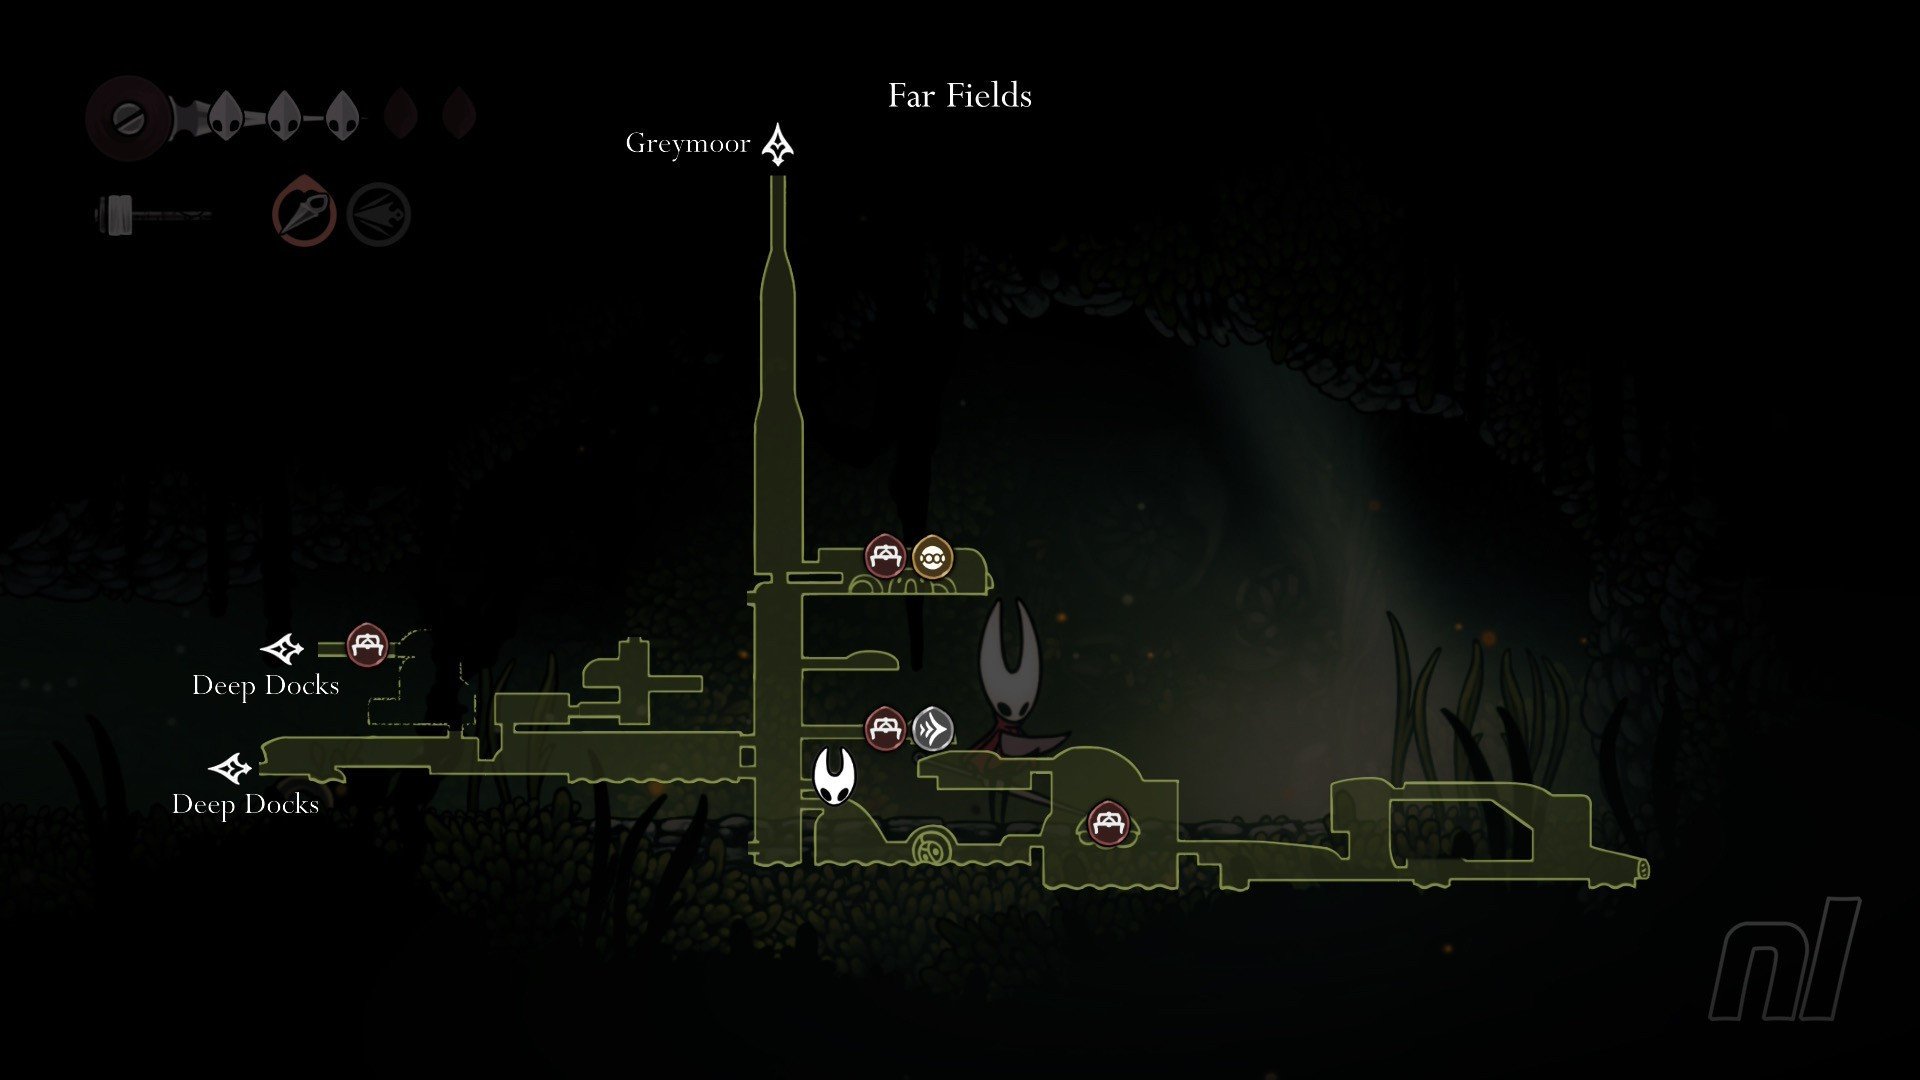
Head through Far Fields until you reach an extremely tall room with gusts of wind blowing upwards that you can't reach. Below a room with a Bench but above the path to the next area is a small room with Shakra hiding inside.
- Far Fields Map Cost - 50 Rosaries
Greymoor Map*
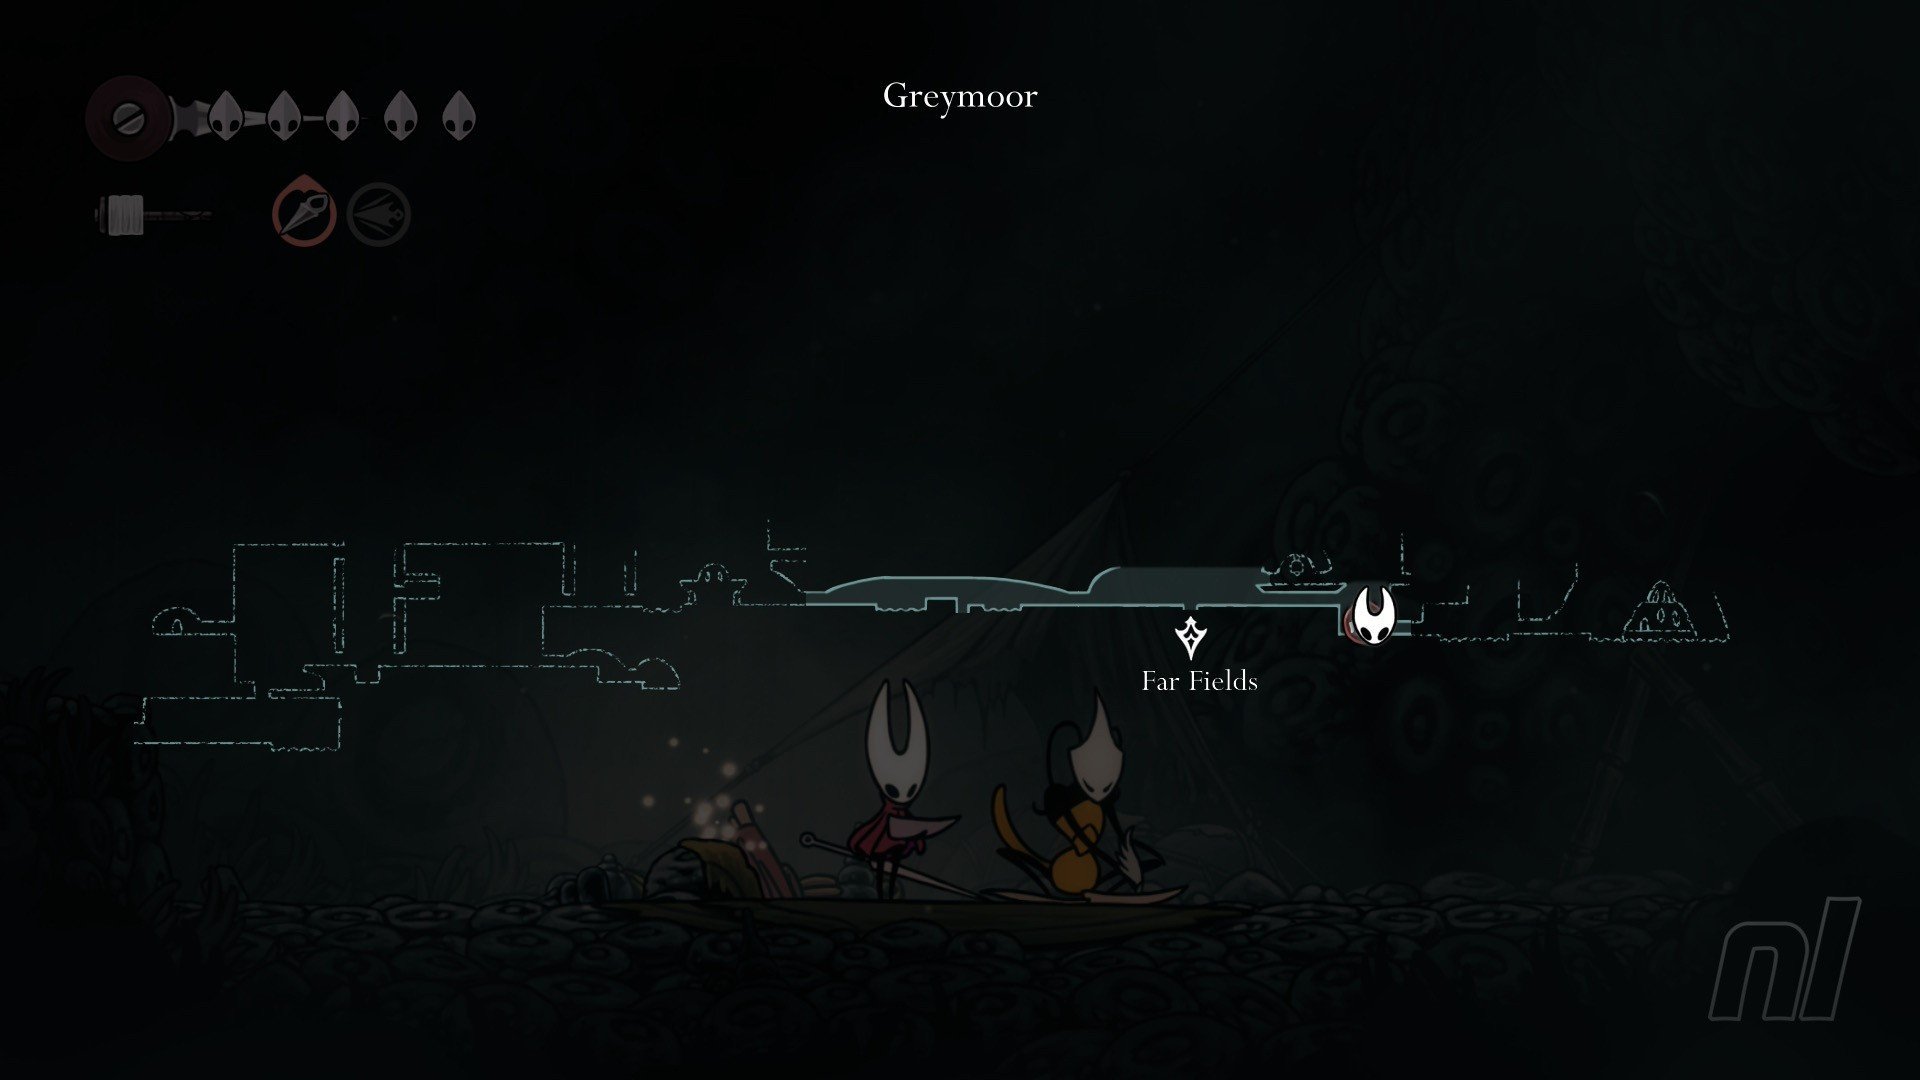
Another easy one. When you enter Greymoor from below, just head right until you move on to a second screen and you'll spot the cartographer happily singing away.
Note that the Greymoor Map also covers a separate sub-region within Greymoor, which you can't reach until you have Double Jump.
- Greymoor Map Cost - 50 Rosaries
Shellwood Map*
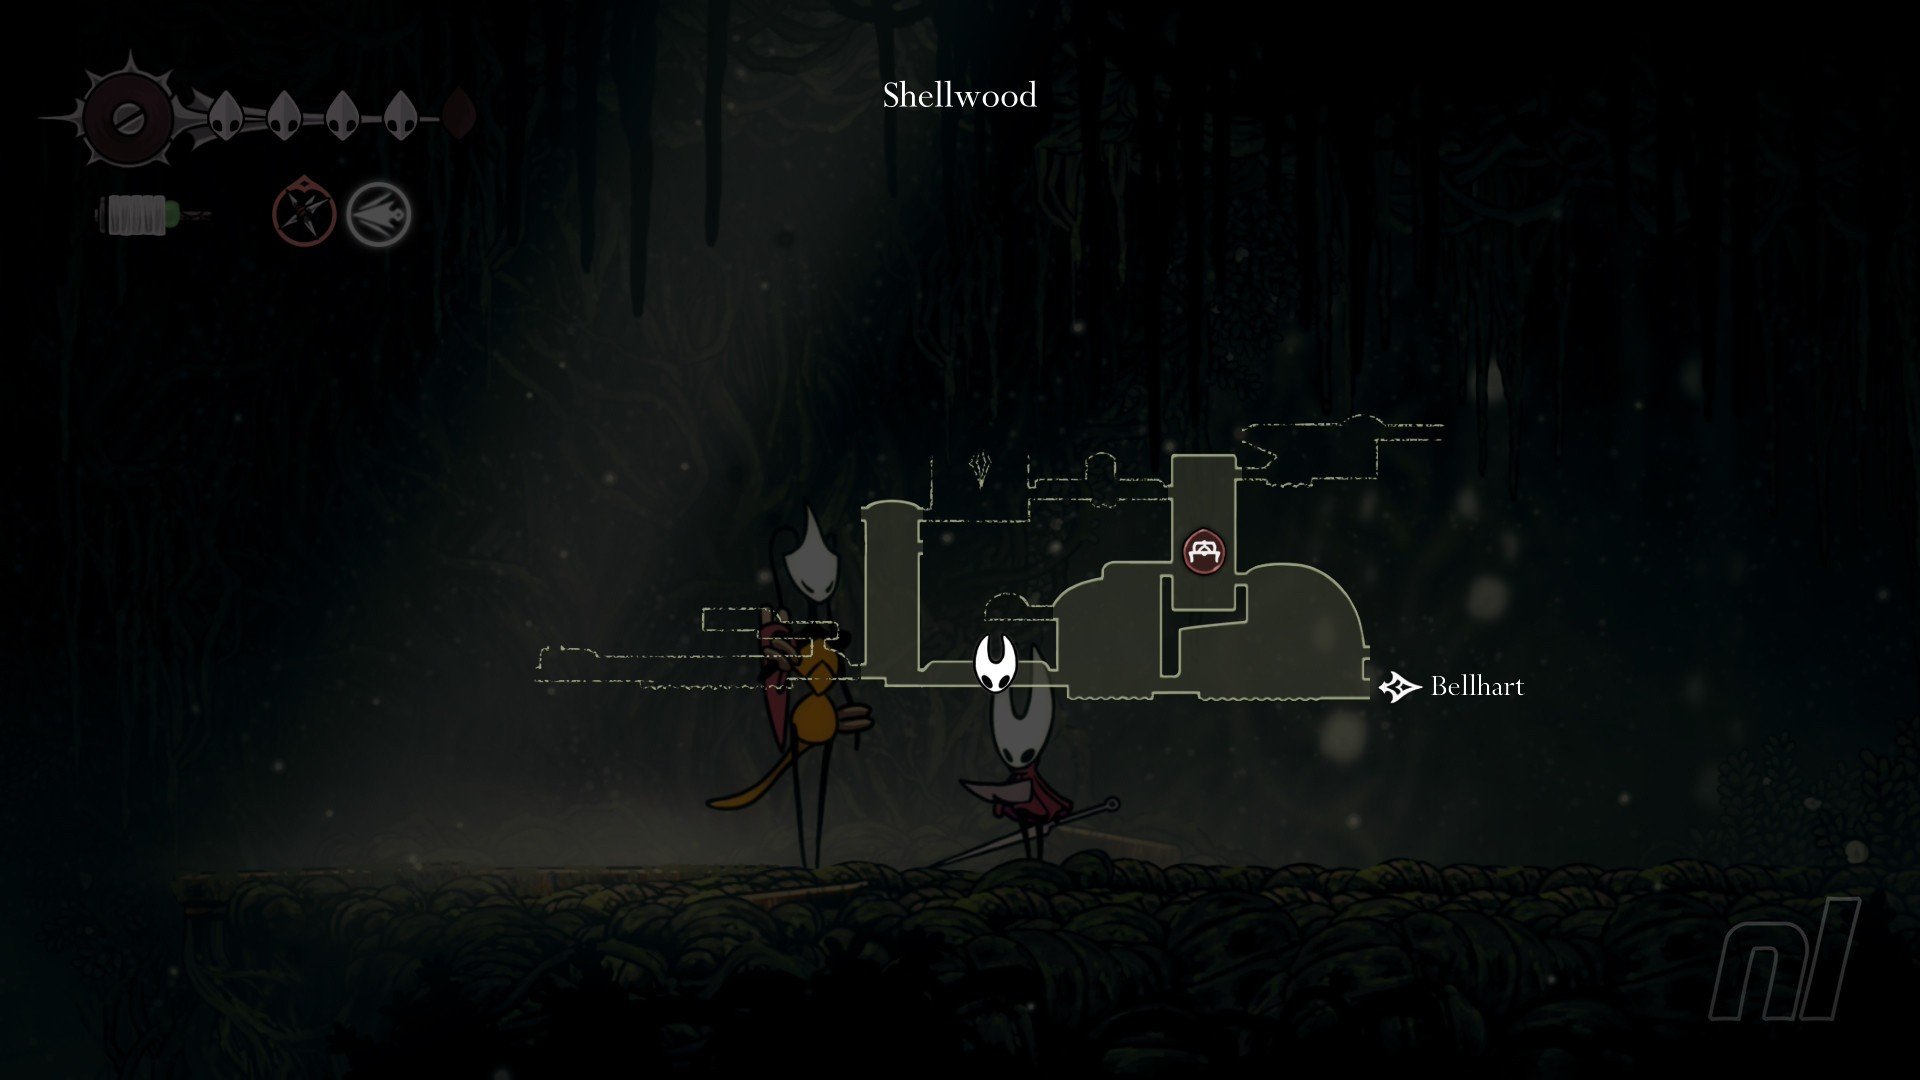
Shakra is hiding in the third room left of the entrance to Shellwood. You'll need to climb up to the very top of the first room and clear a combat trial to get to the other side of the big door, however, before you can reach her.
- Bellhart Map Cost - 40 Rosaries
- Shellwood map Cost - 70 Rosaries
Wormways Map*
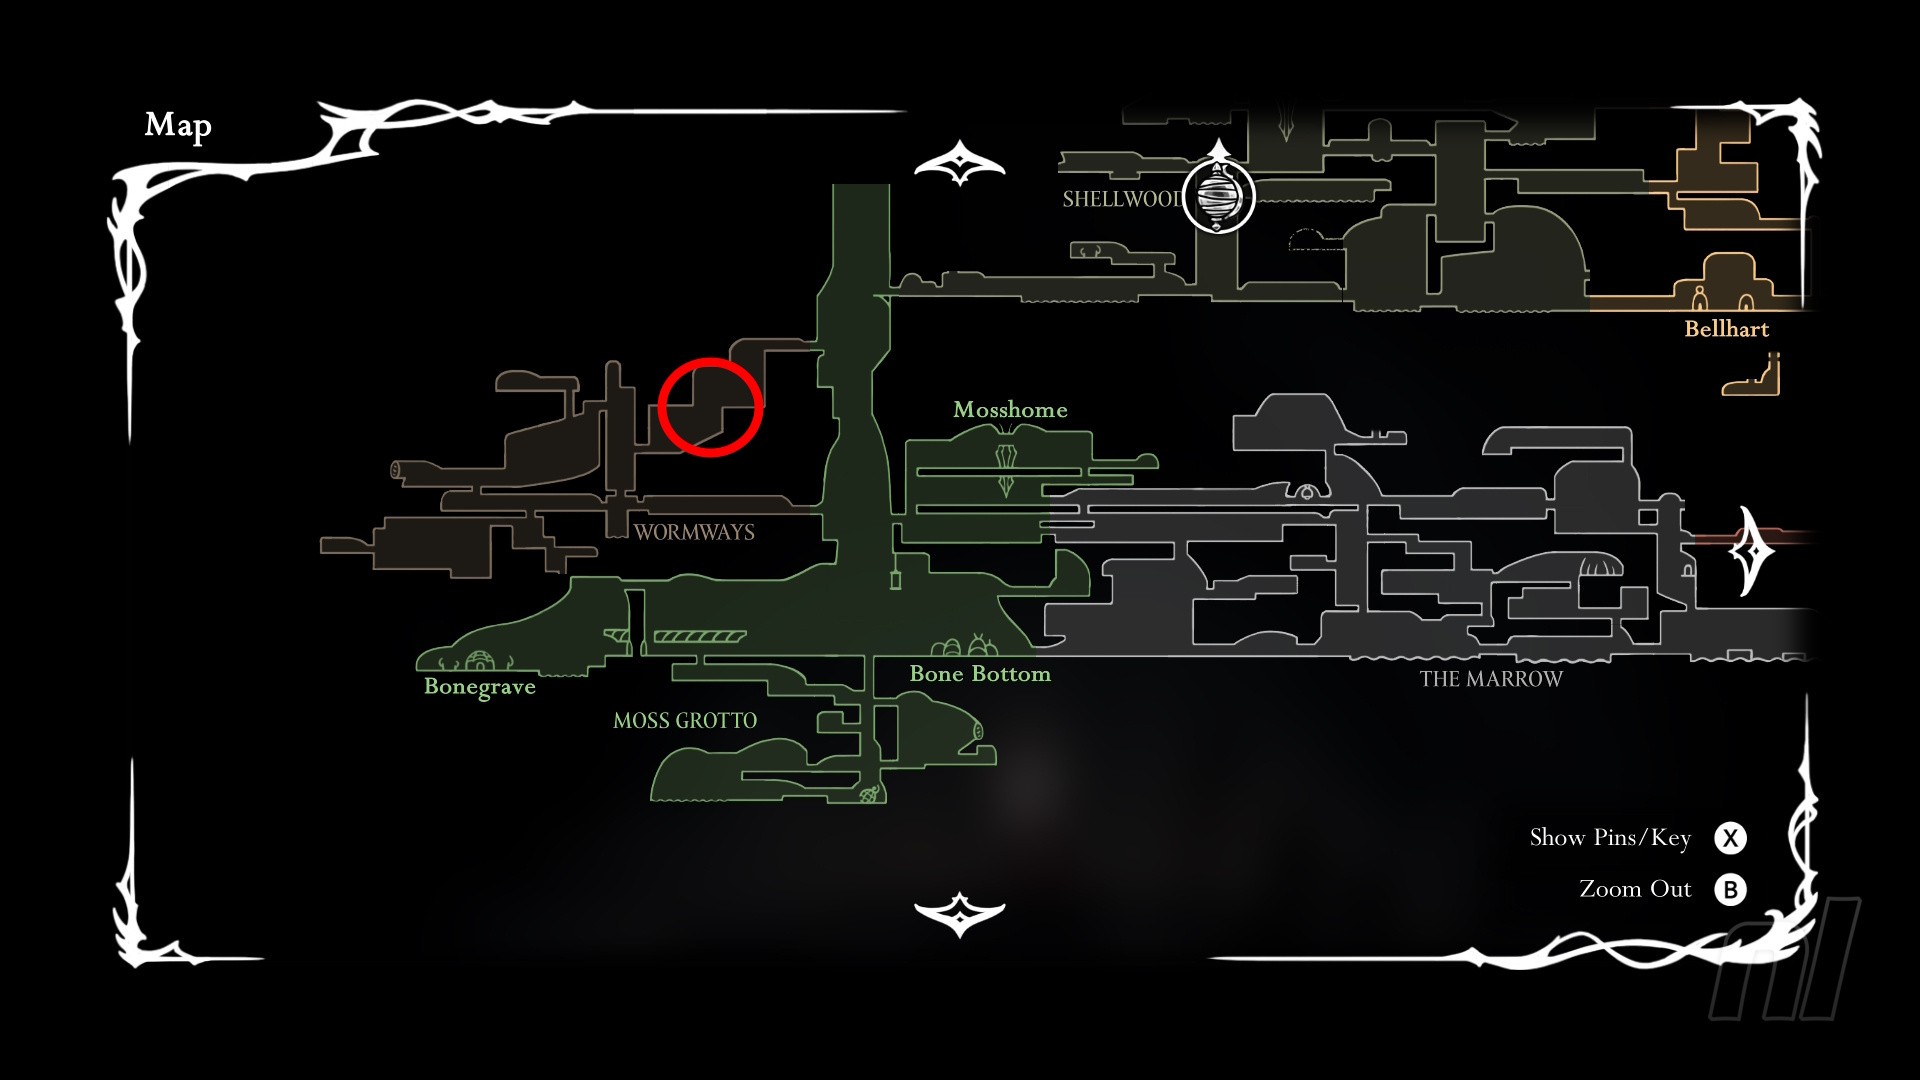
Enter the Wormways from Shellwood and simply follow the path left and down (be careful of those worms though!). Loof for a small opening on the left side of the wall — you'll need to dash to reach it. You'll also hear Shakra singing, which is helpful. She's hiding in a small alcove.
- Wormways Map Cost - 70 Rosaries
Hunter's March Map*
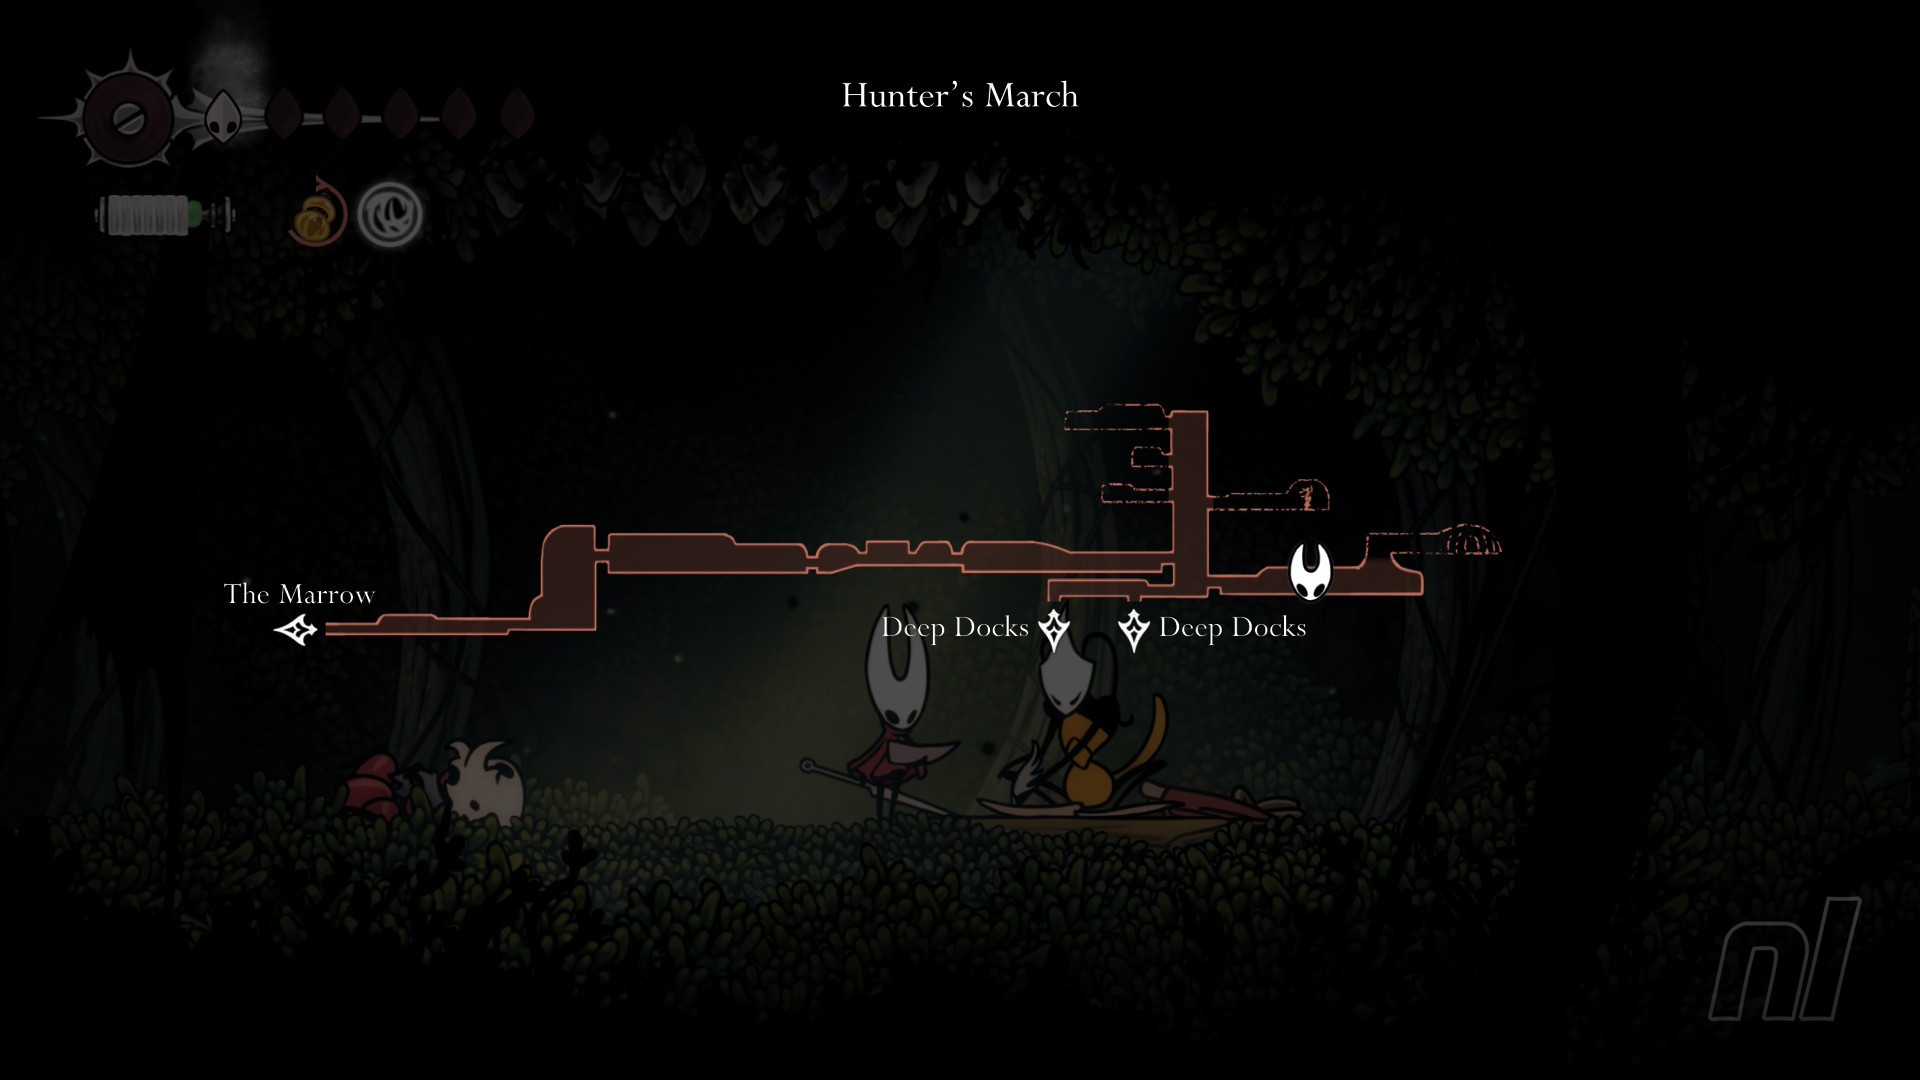
If you can make it through Hunter's March — congrats! Ants suck. But Shakra is nice and easy to find here. She's located to the far right of the area and, if you're heading towards the Chapel of the Beast, then you'll bump into her.
For reference, the door you want to go through in the room with the spikes and gusts of wind, it's the bottom-right one.
- Hunter's March Map Cost - 70 Rosaries
Weavenest Atla Map
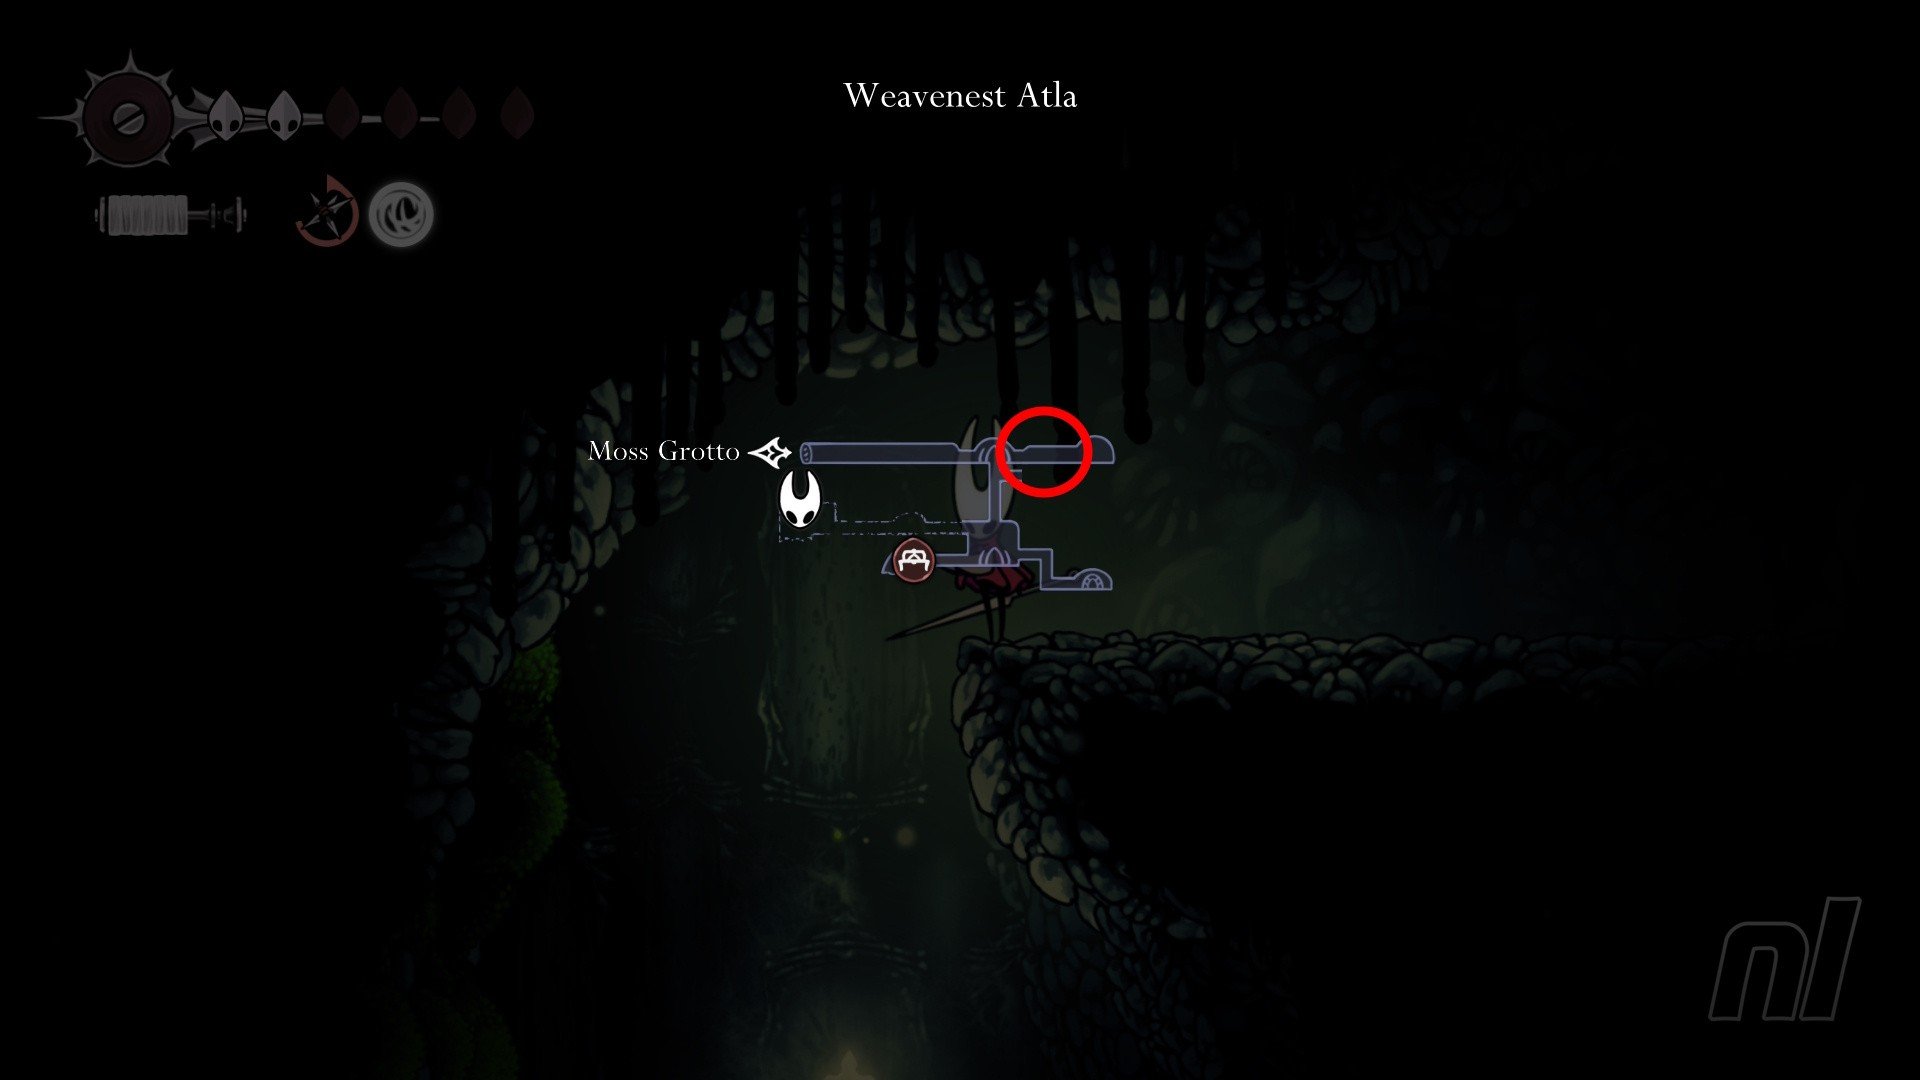
No shop here! Instead, once you've turned the light on here, head back left one room and examine the stand for a map.
The Slab Map
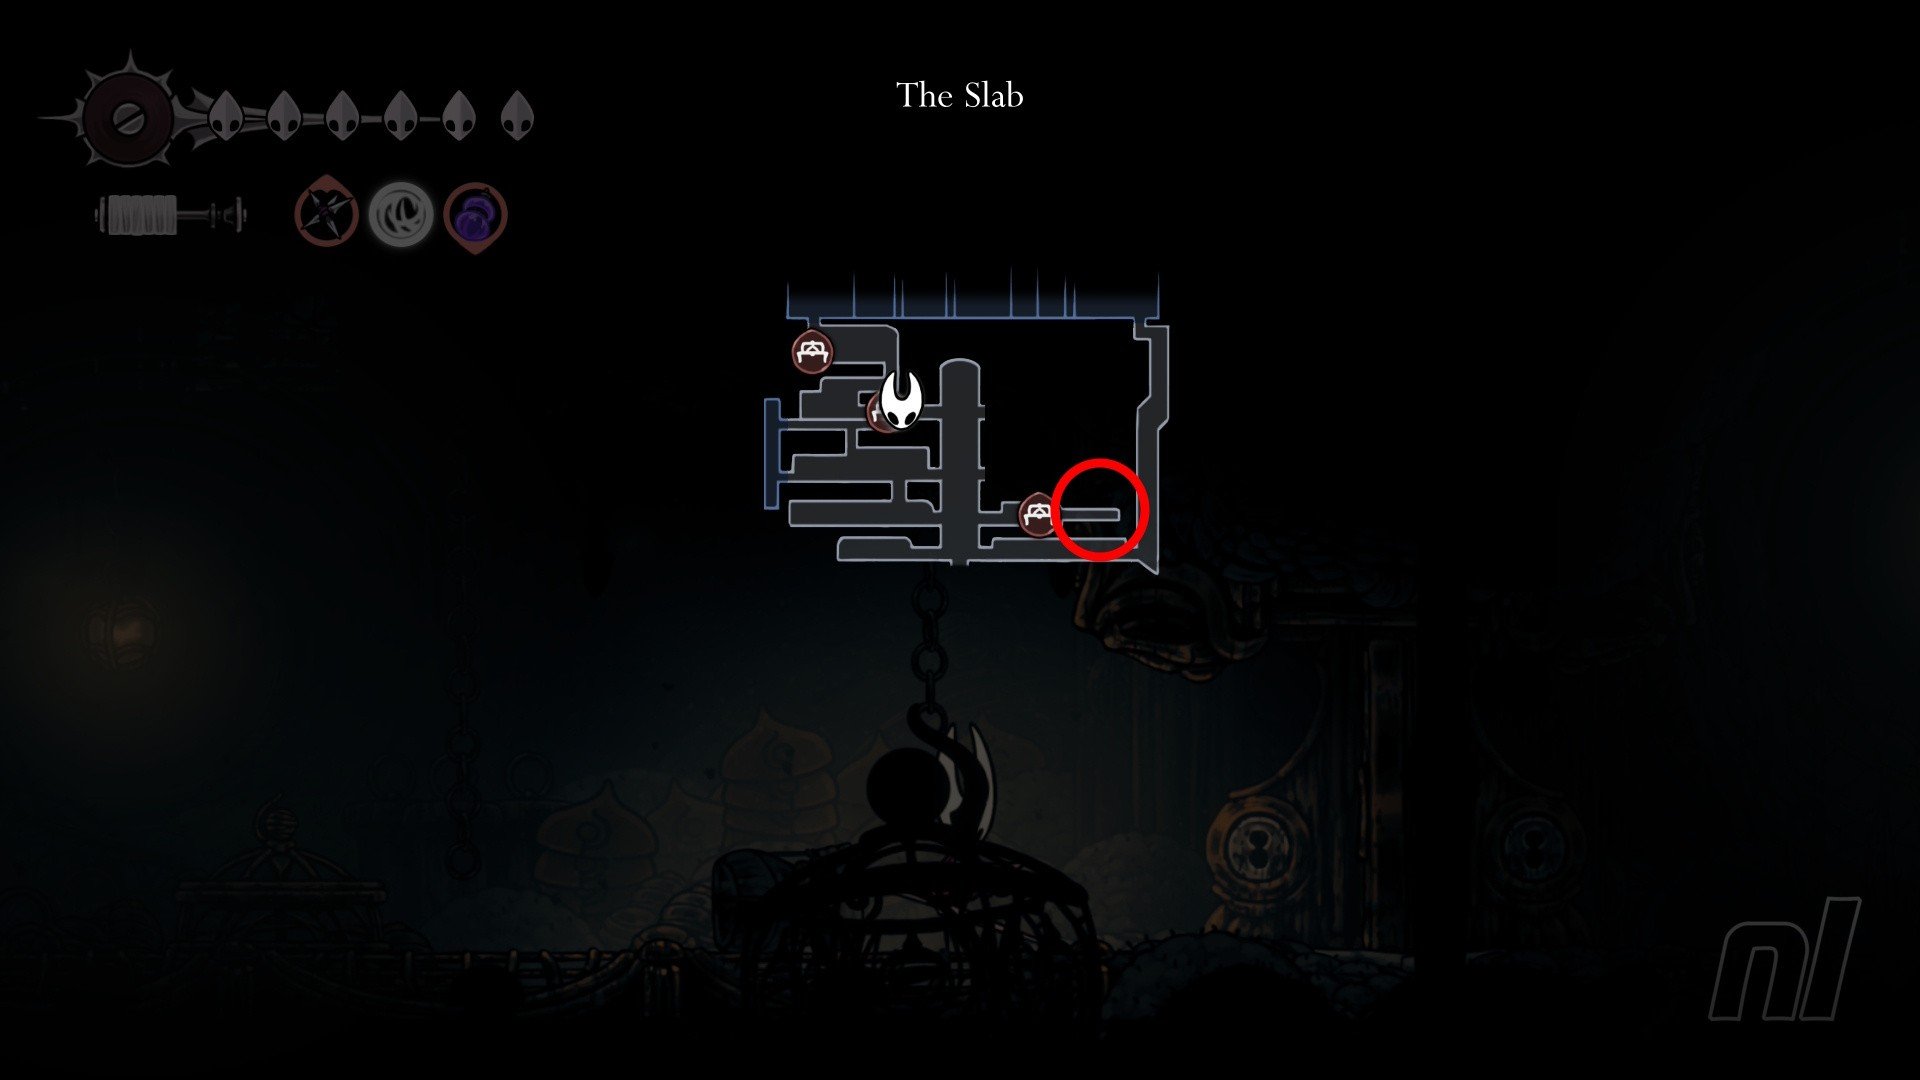
Another map you don't need to buy! This one can be found on the corpse of a bug, to the right of the very first bench where Gribble is (that's assuming you got captured)
Blasted Steps Map*
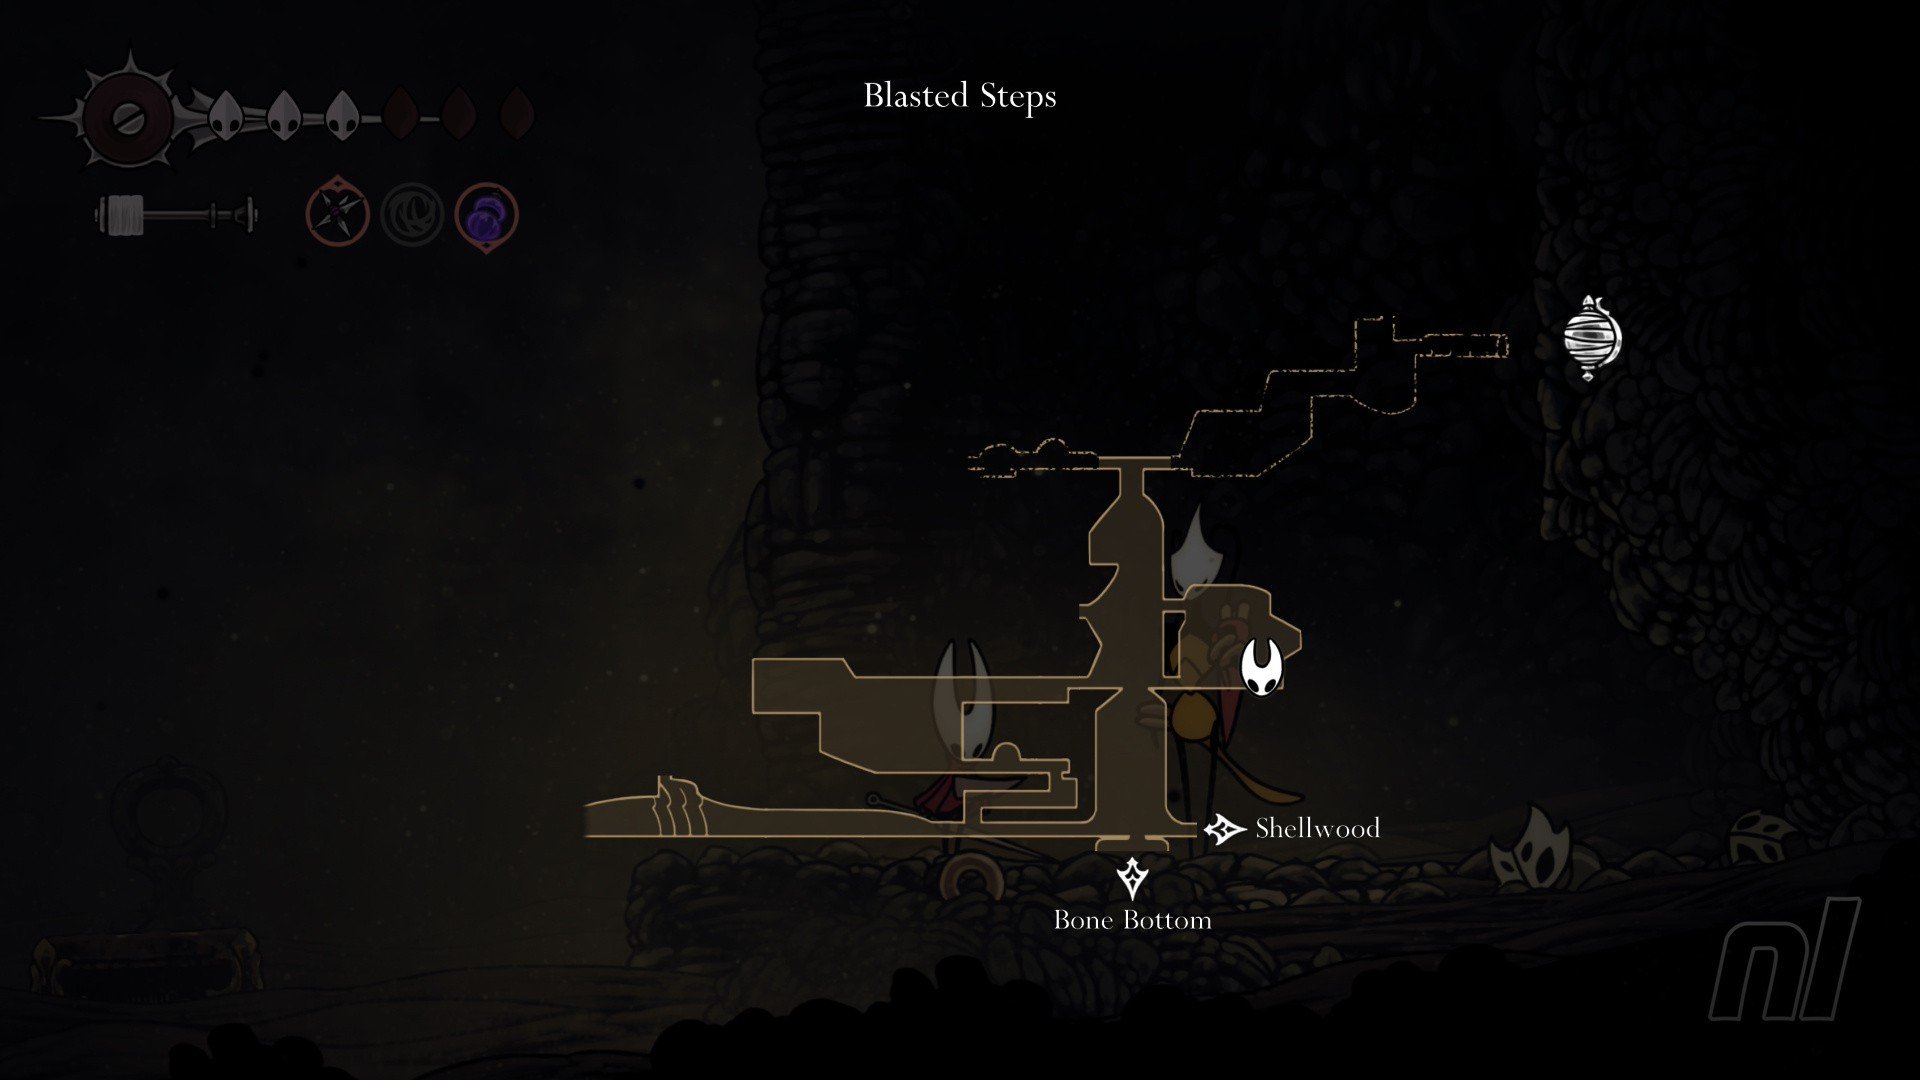
We're glad to see you again, Shakra! The warrior can be found on the second "layer" of the area. You'll need to platform your way up and around, but she's easy to find — right after a sea of bugs waiting to eat you and some platforms in the sand.
Essentially, go through here as normal and you should come across her.
- Blasted Steps Map Cost - 70 Rosaries
Sinner's Road Map*

Shakra has taken refuge right next to a bench in Sinner's Road. To get here, when you're in the room with the bench signs, you'll need to go right instead of left (you can't get to the bench directly from below.)
In the next room, platform your way all the way to the top and left, and then go into the next room. You'll be back in the room you were in before, just higher up. Jump across and you'll meet Shakra on the other side.
- Sinner's Road Map Cost - 70 Rosaries
Grand Gate Map
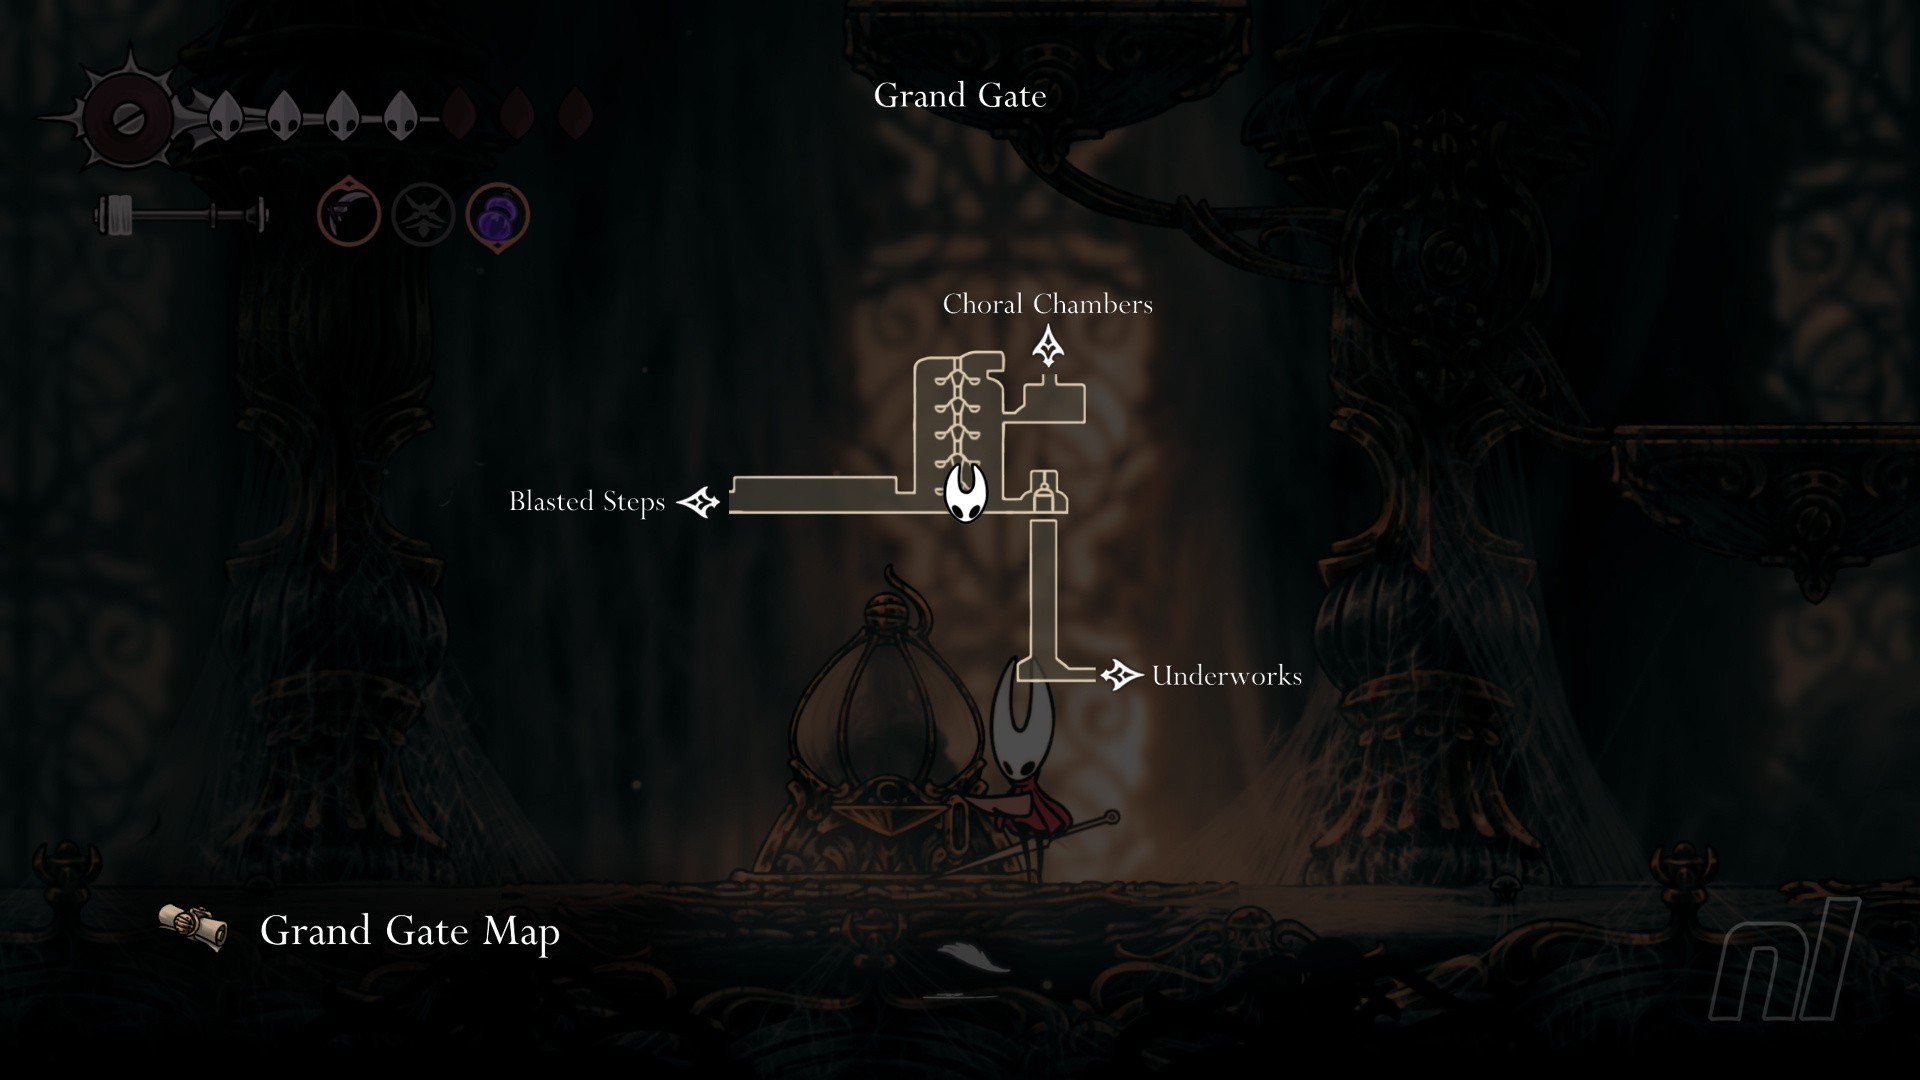
You can buy this just as you enter The Citadel from a machine. That's if you came here after defeating the Last Judge.
If not, then you'll need to head all the way west and enter the Grand Gate from there. You can get a Spool Fragment up top, too.
- Grand Gate Map Cost - 40 Rosaries
Choral Chambers Map
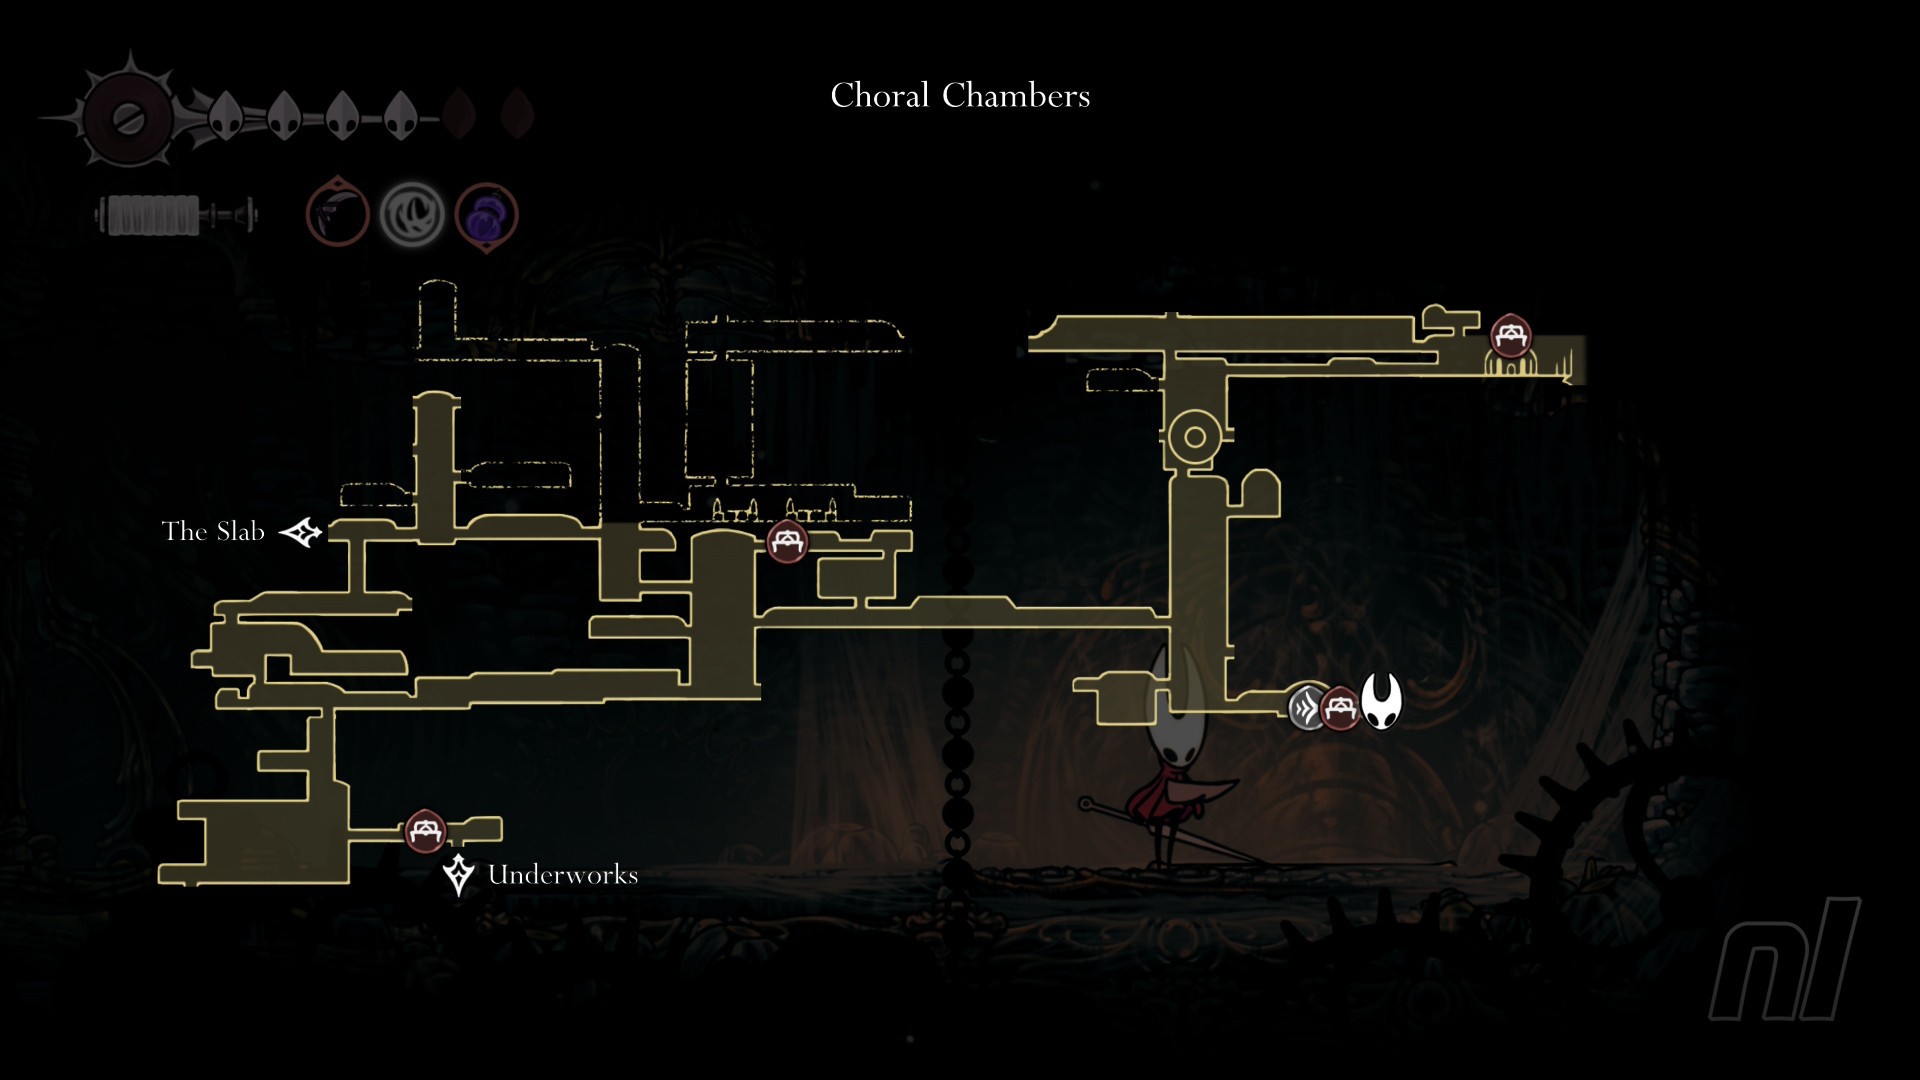
Shakra hasn't quite made it all the way up to The Citadel like you, but you still need to fork out some cash for this map. We found our map at the Citadel Replica stand inside the Grand Bellway, which is on the far east side of the area.
- Choral Chambers Map Cost - 70 Rosaries
Underworks Map
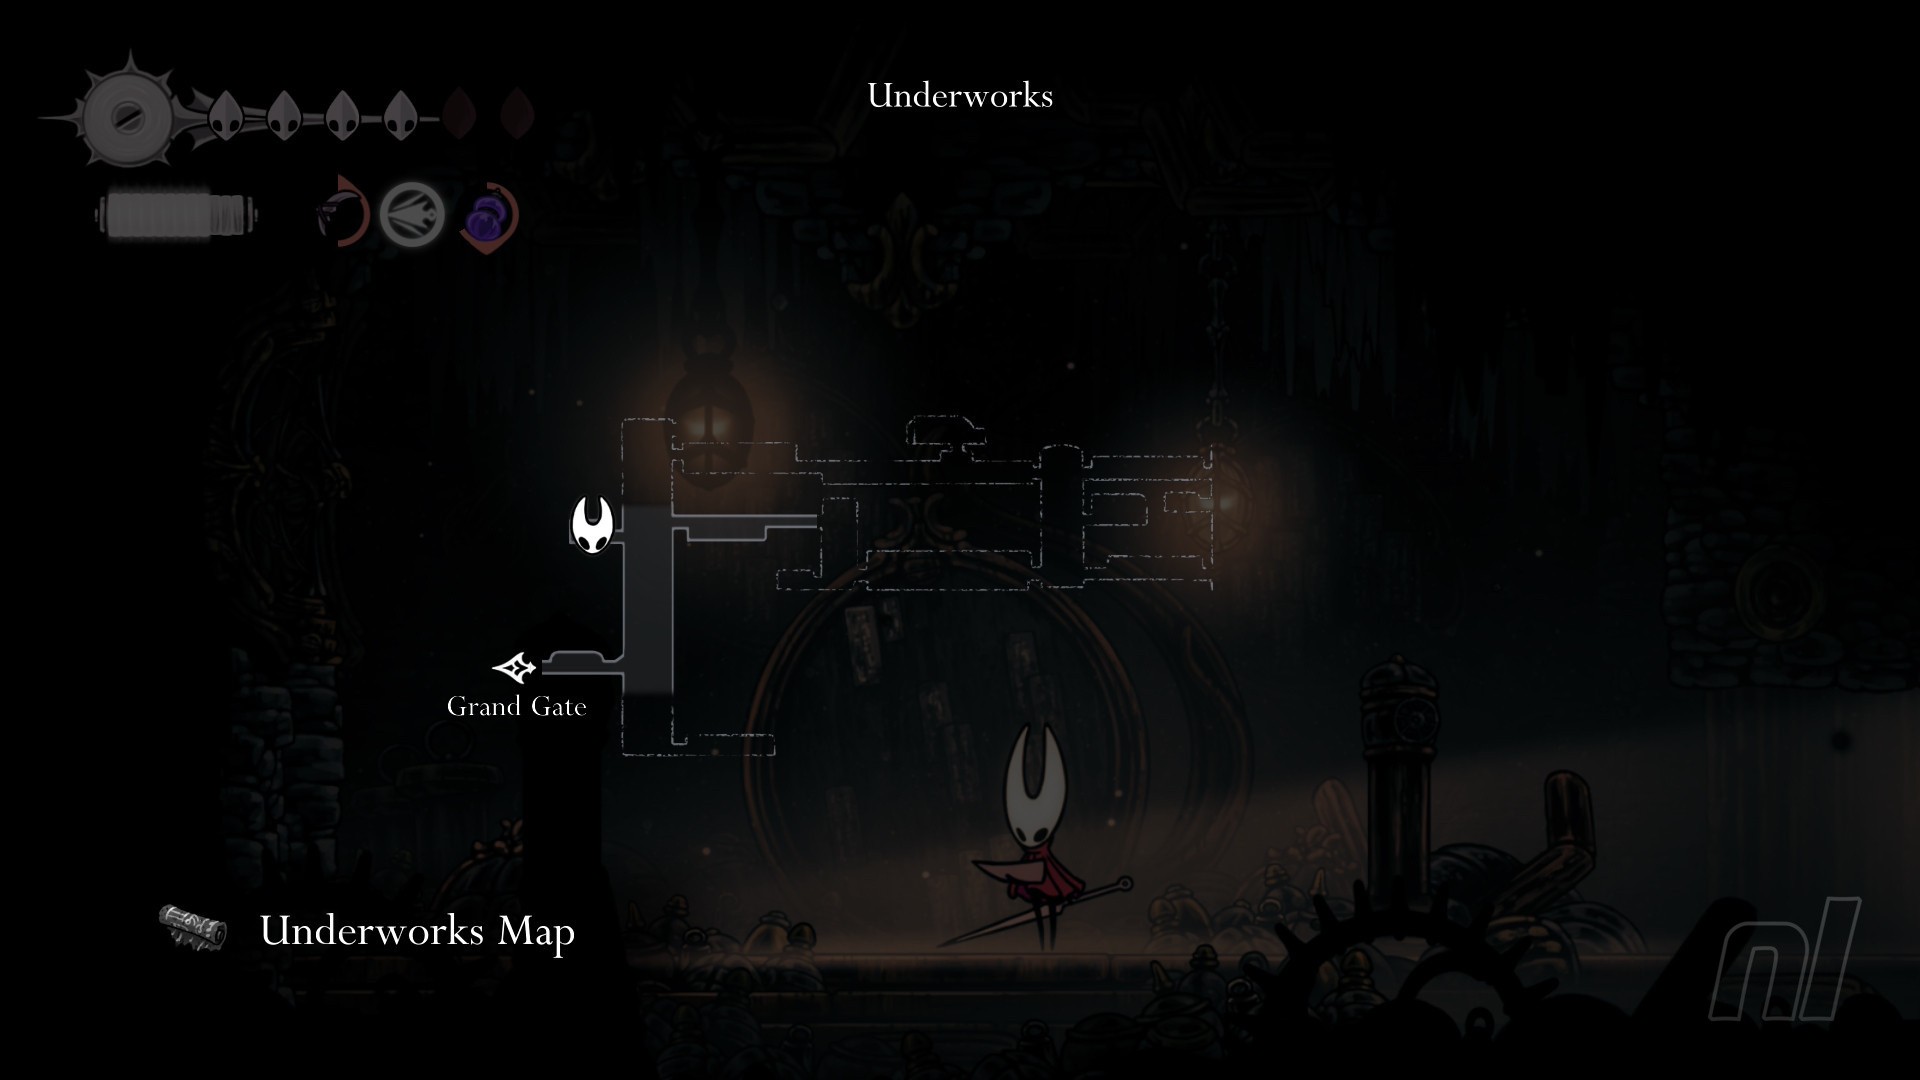
Taking the broken lift down to the Underworks isn't pleasant, but it will bring you close to the map. Climb up the very first tall room (it's on the west side) and head into the west room to grab the map on the wall.
Cogwork Core Map
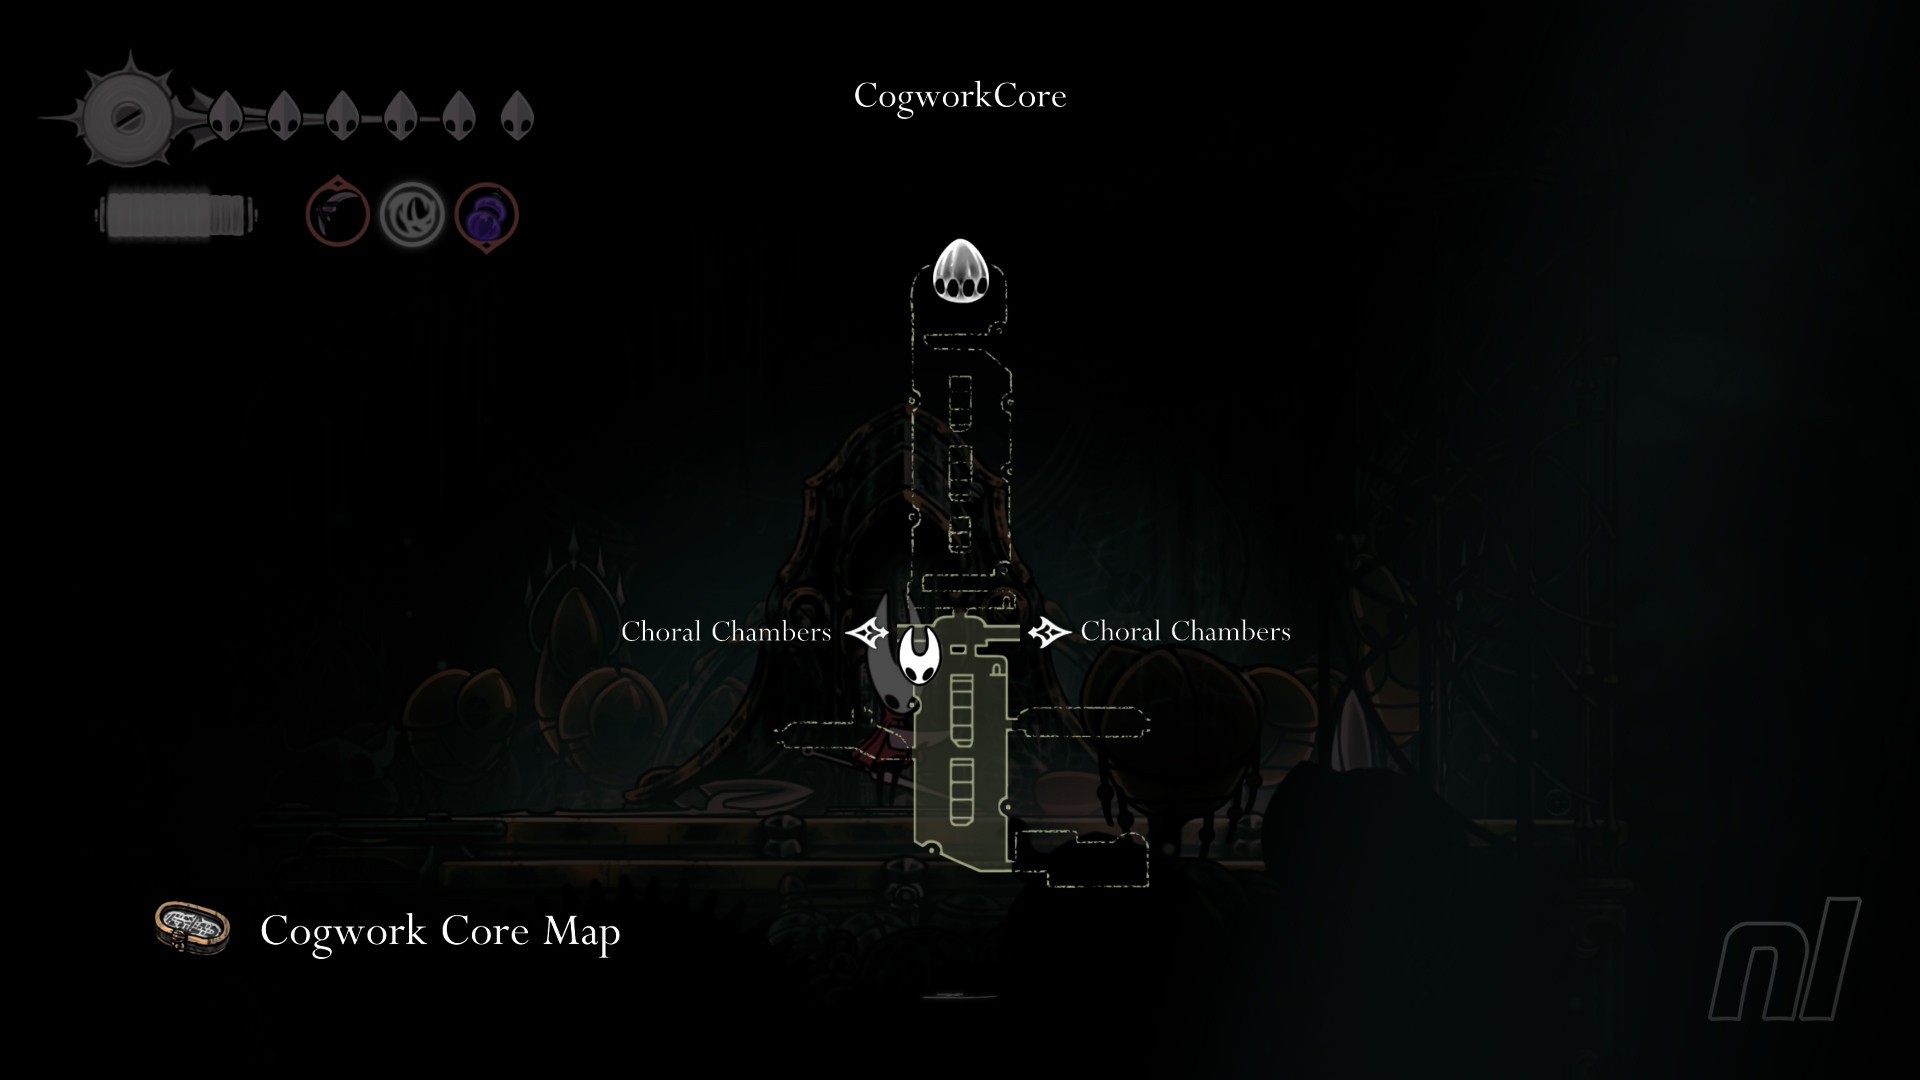
After defeating the Cogwork Dancers, drop down the opening on the left, then head left and go inside the door with the bench sign. Hit the cog to get the bench set up here, then climb up and examine the contraption up top for the map.
Whiteward Map
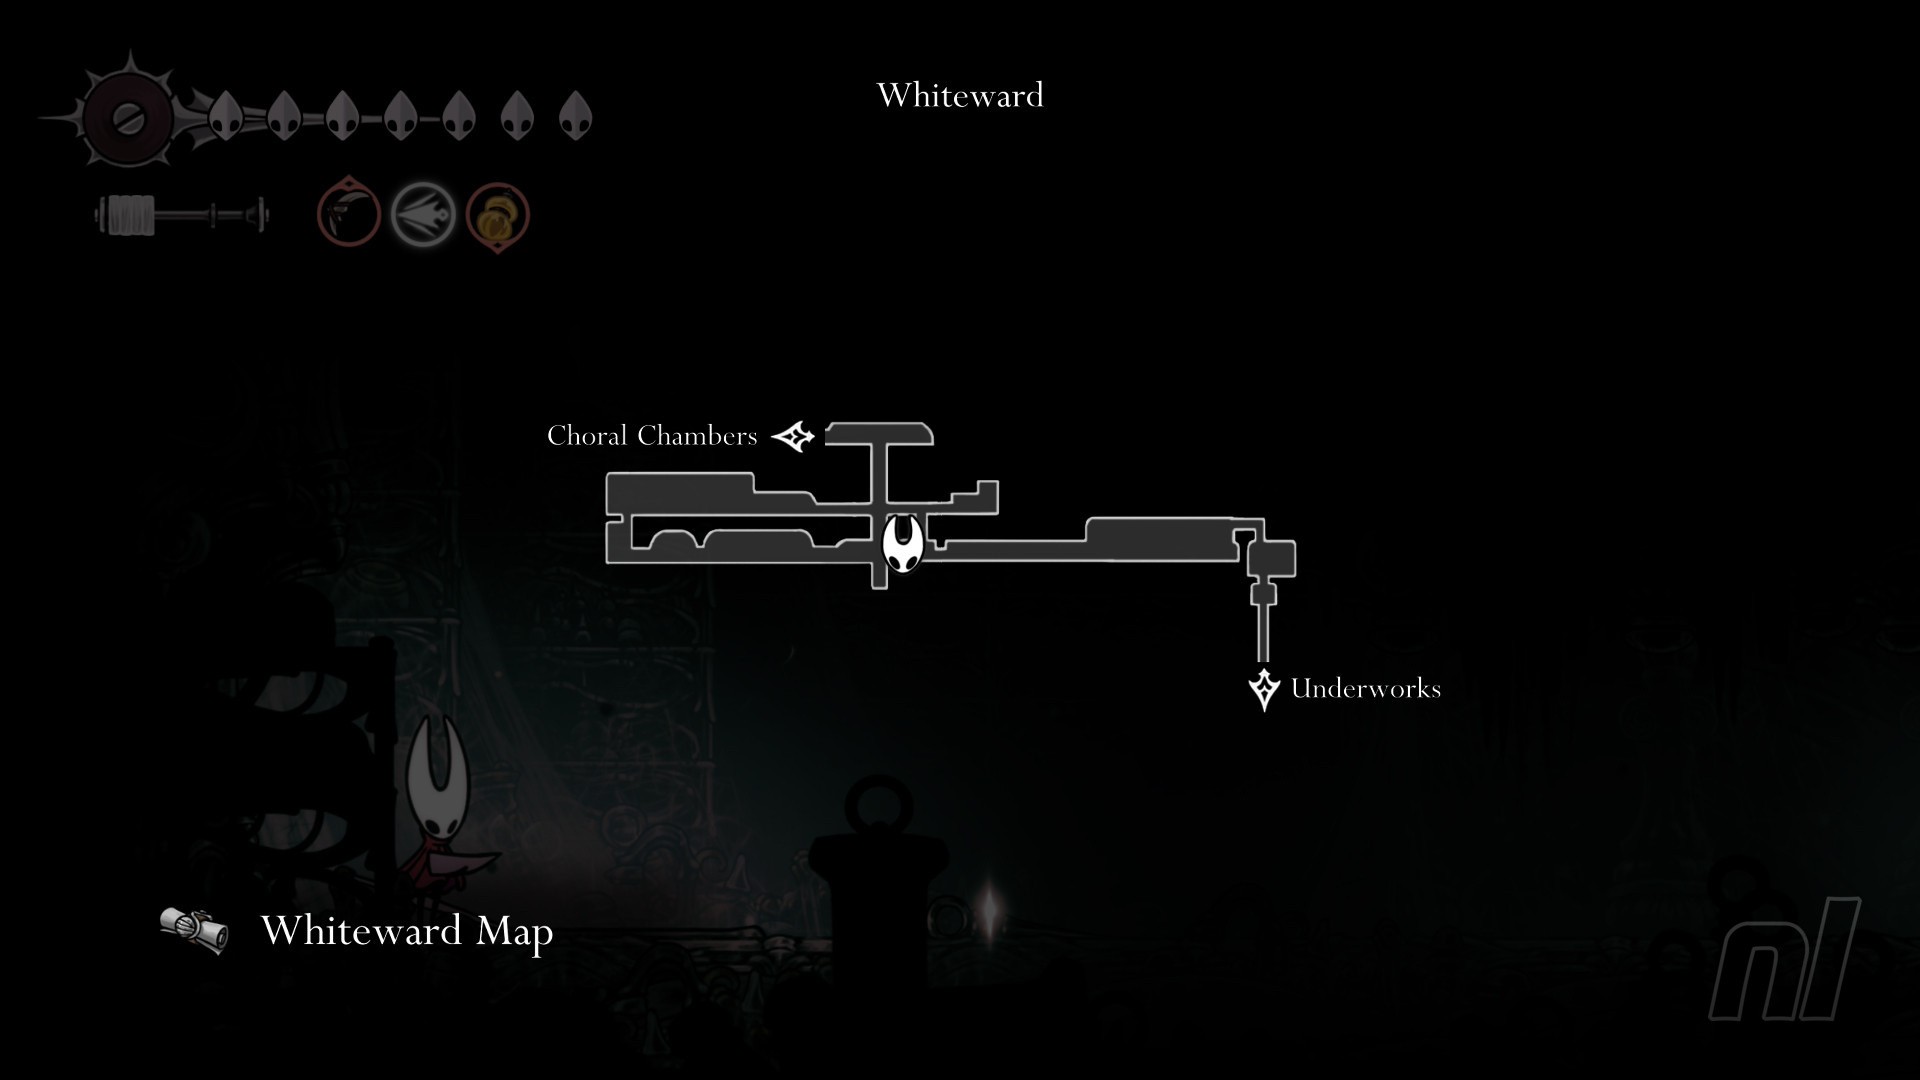
This place gives us the creeps... luckily, the map is nice and easy to find. You'll reach it after the narrow halls where you have to avoid steam. Jump across the elevator shaft and then drop down when you reach a dead end on the right.
You should land right next to a model Citadel, so cough up those rosaries.
- Whiteward Map Cost - 70 Rosaries
Whispering Vaults Map
No Shakra yet again *sigh*. Instead, you're looking for a machine that dispenses maps here. This one is very nicely hidden, however. Once you enter the Vaults from the rotating pathway (and have cleared the enemy gauntlet) run through the next long screen, and then you'll enter the drafty vaults of the area.
Jump up and across where a large enemy will start attacking. Either deal with it or run past it and hit the small cog hanging on the ceiling to drop a ladder down. Climb it and head left for the map. (this is also a nice shortcut back to Songclave)
- Whispering Vaults Map Cost - 70 Rosaries
Mount Fay Map*
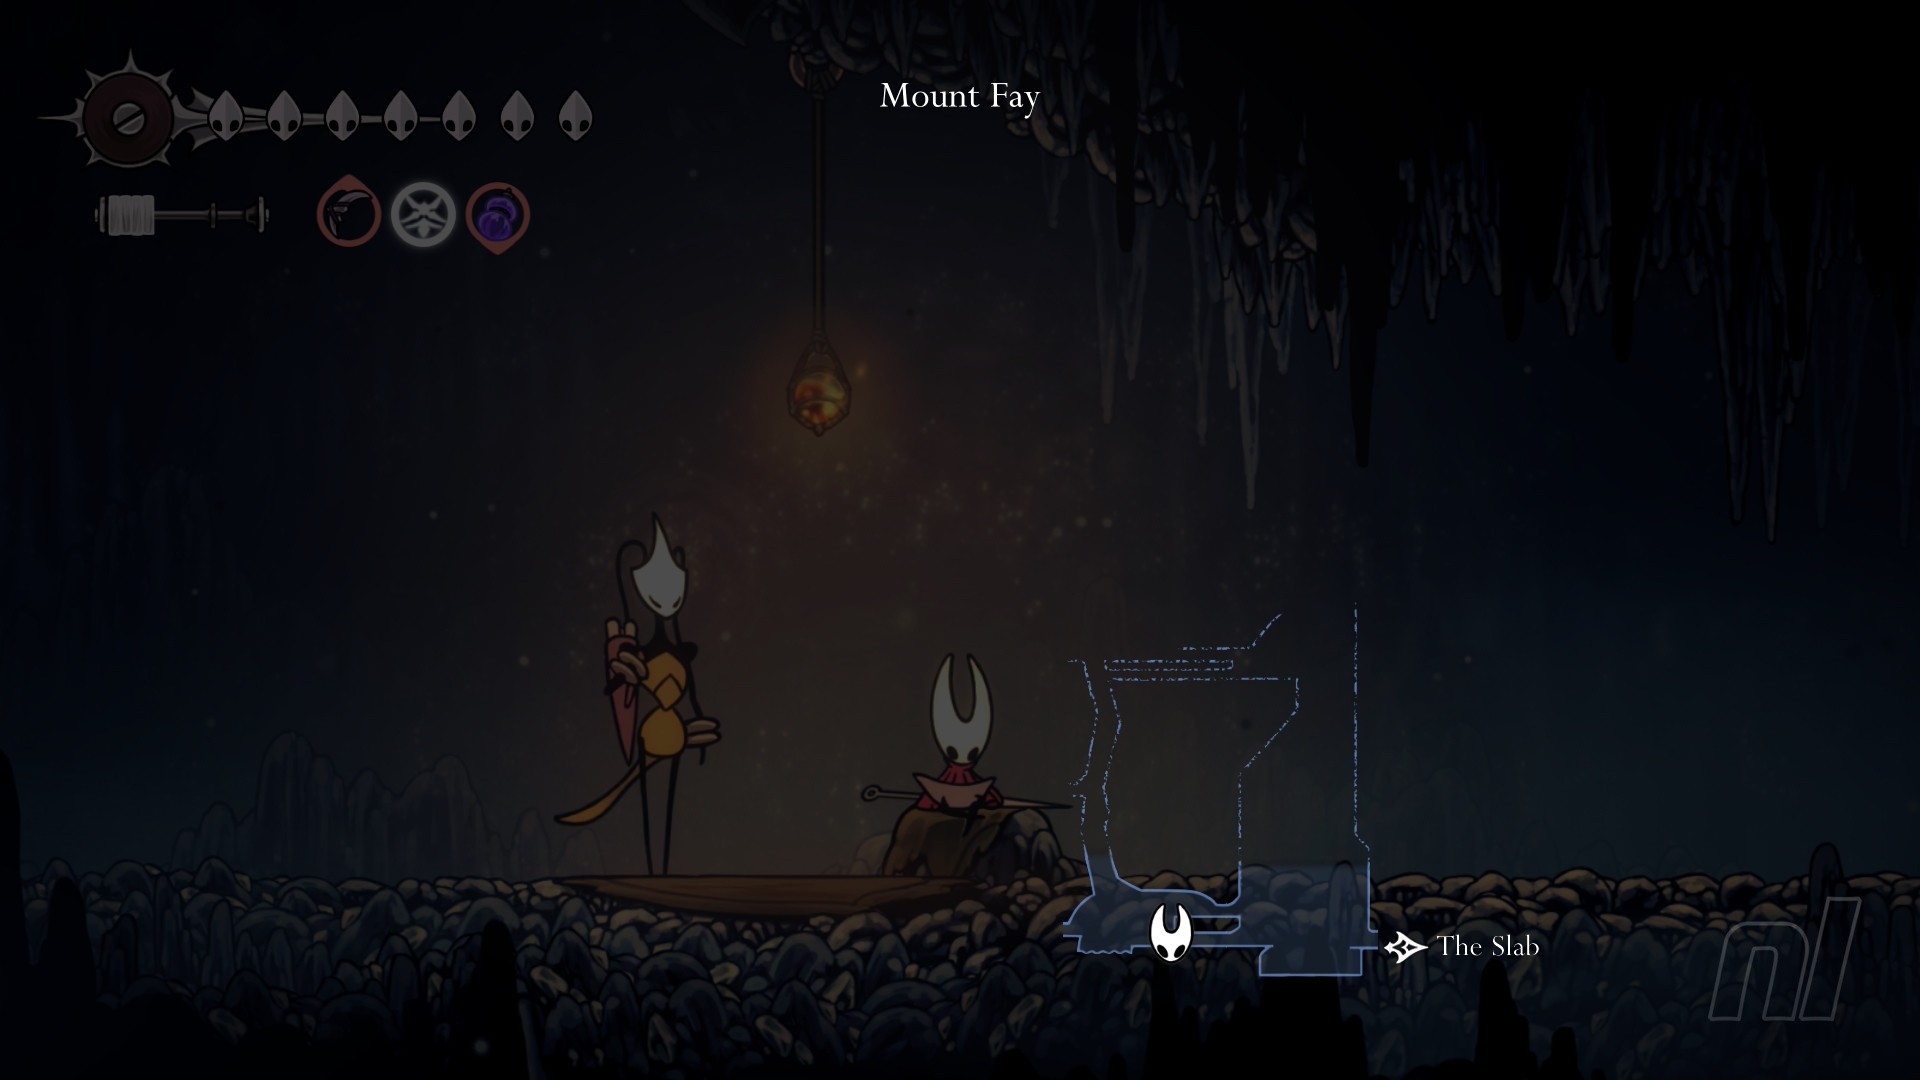
Despite how difficult Mount Fay actually is to traverse, Shakra (she's back!) is easy to find. She's in the very first room inside the mountain itself, keeping warm by the fire and offering a bench for Hornet, to prepare herself for the challenge ahead.
- Mount Fay Map Cost - 40 Rosaries
High Halls Map
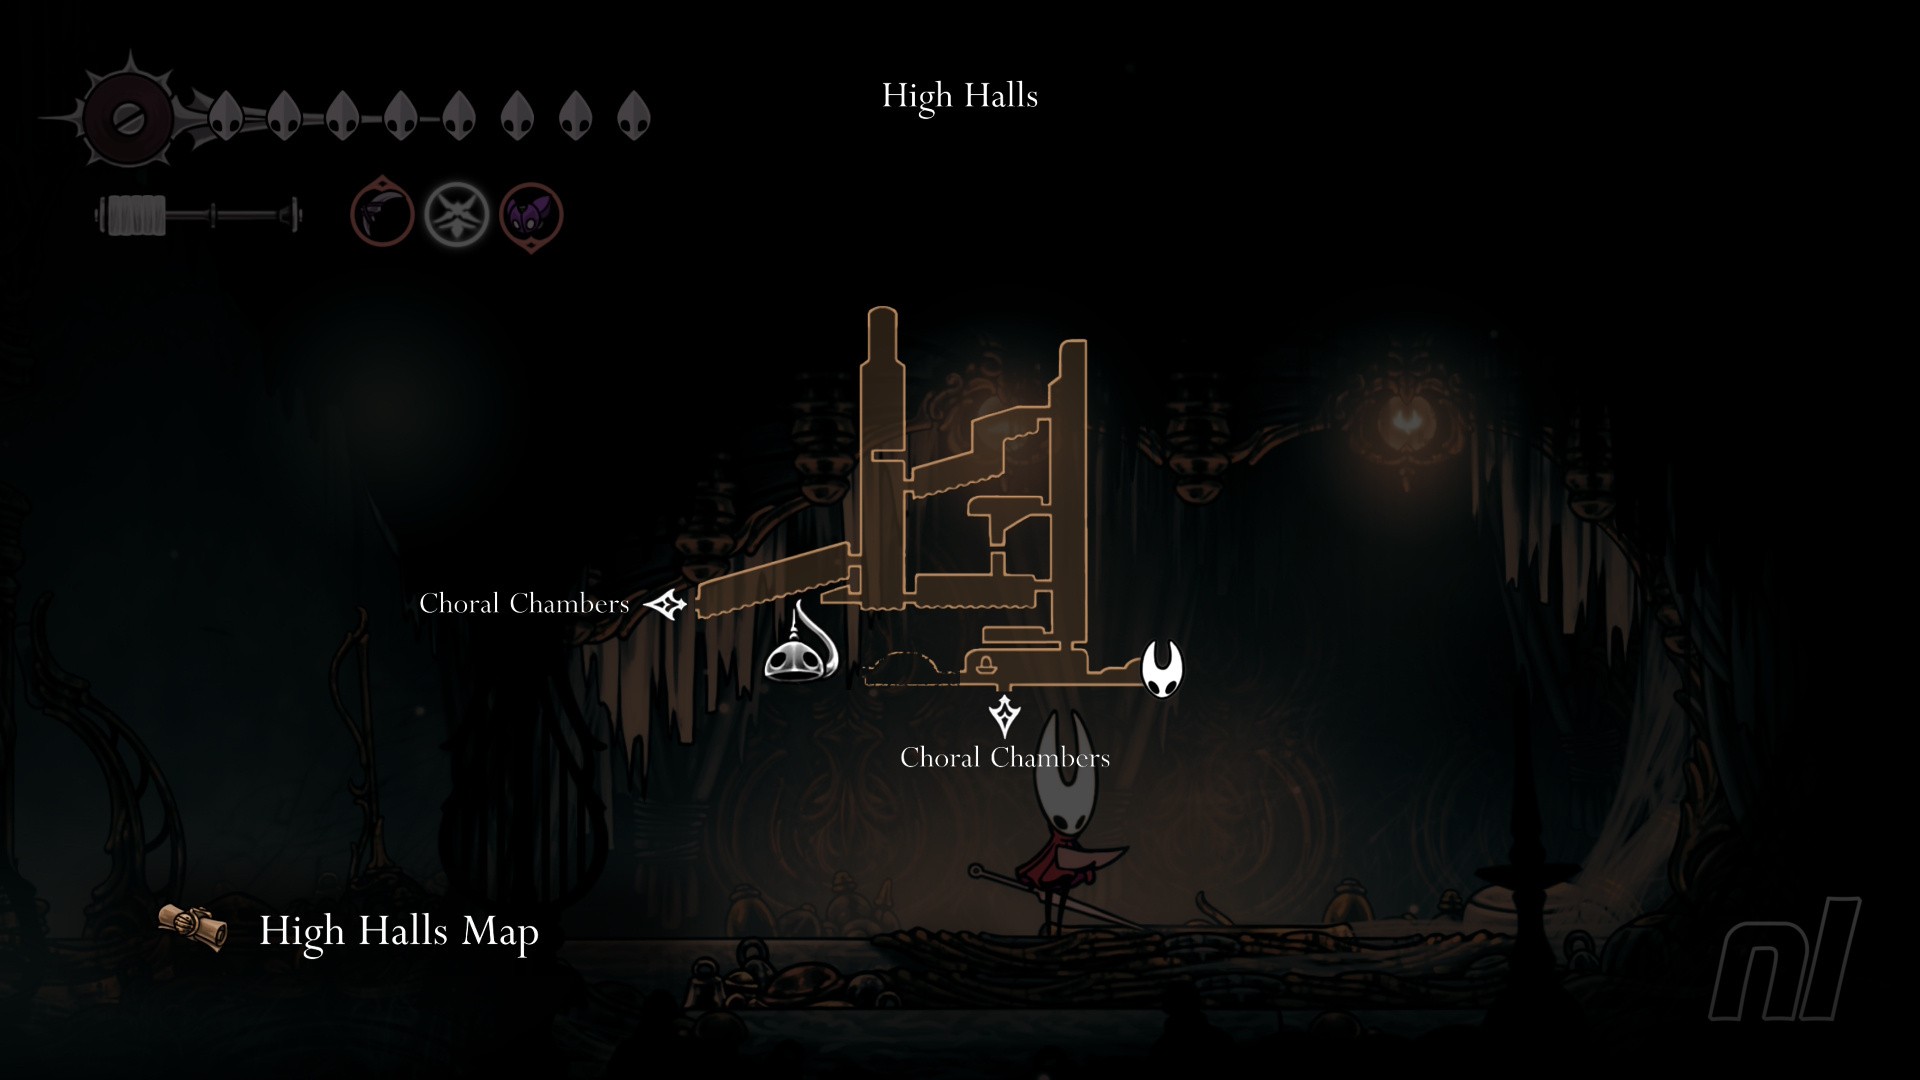
This one's right at the end the High Halls, next to the Ventrica Station. You just need to make your way through the place.
You'll need Clawline and Double Jump to progress, though.
- High Halls Map Cost - 70 Rosaries
Memorium Map
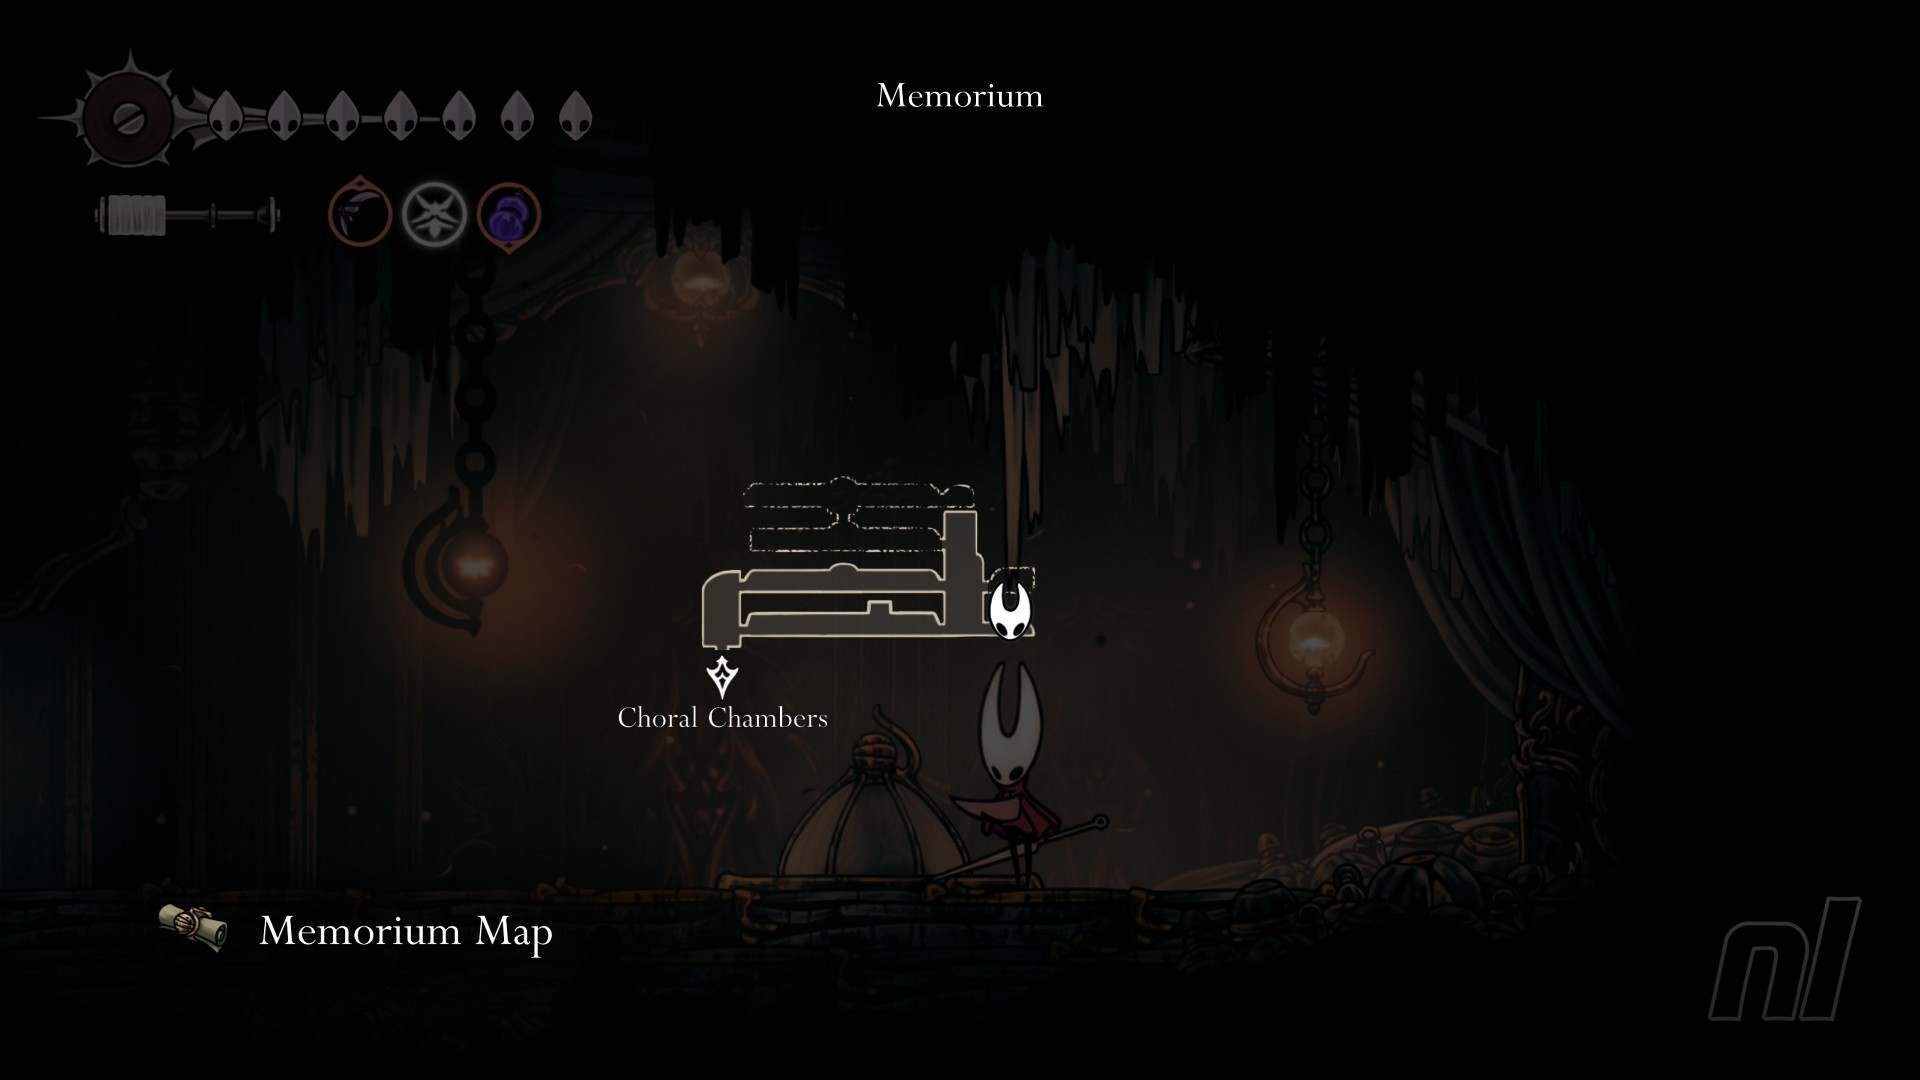
Like most of the other maps in The Citadel, you'll need to find the Citadel Replica to buy the map here.
Luckily, it's not too far in. Head up top in the first room, then right through the door. Fight your way through some tough enemies (or avoid if you want!) and enter another tall room. Drop down to the bottom then enter the door on the right with the sign above it for the map.
- Memorium Map Cost - 70 Rosaries
Sands of Karak Map*
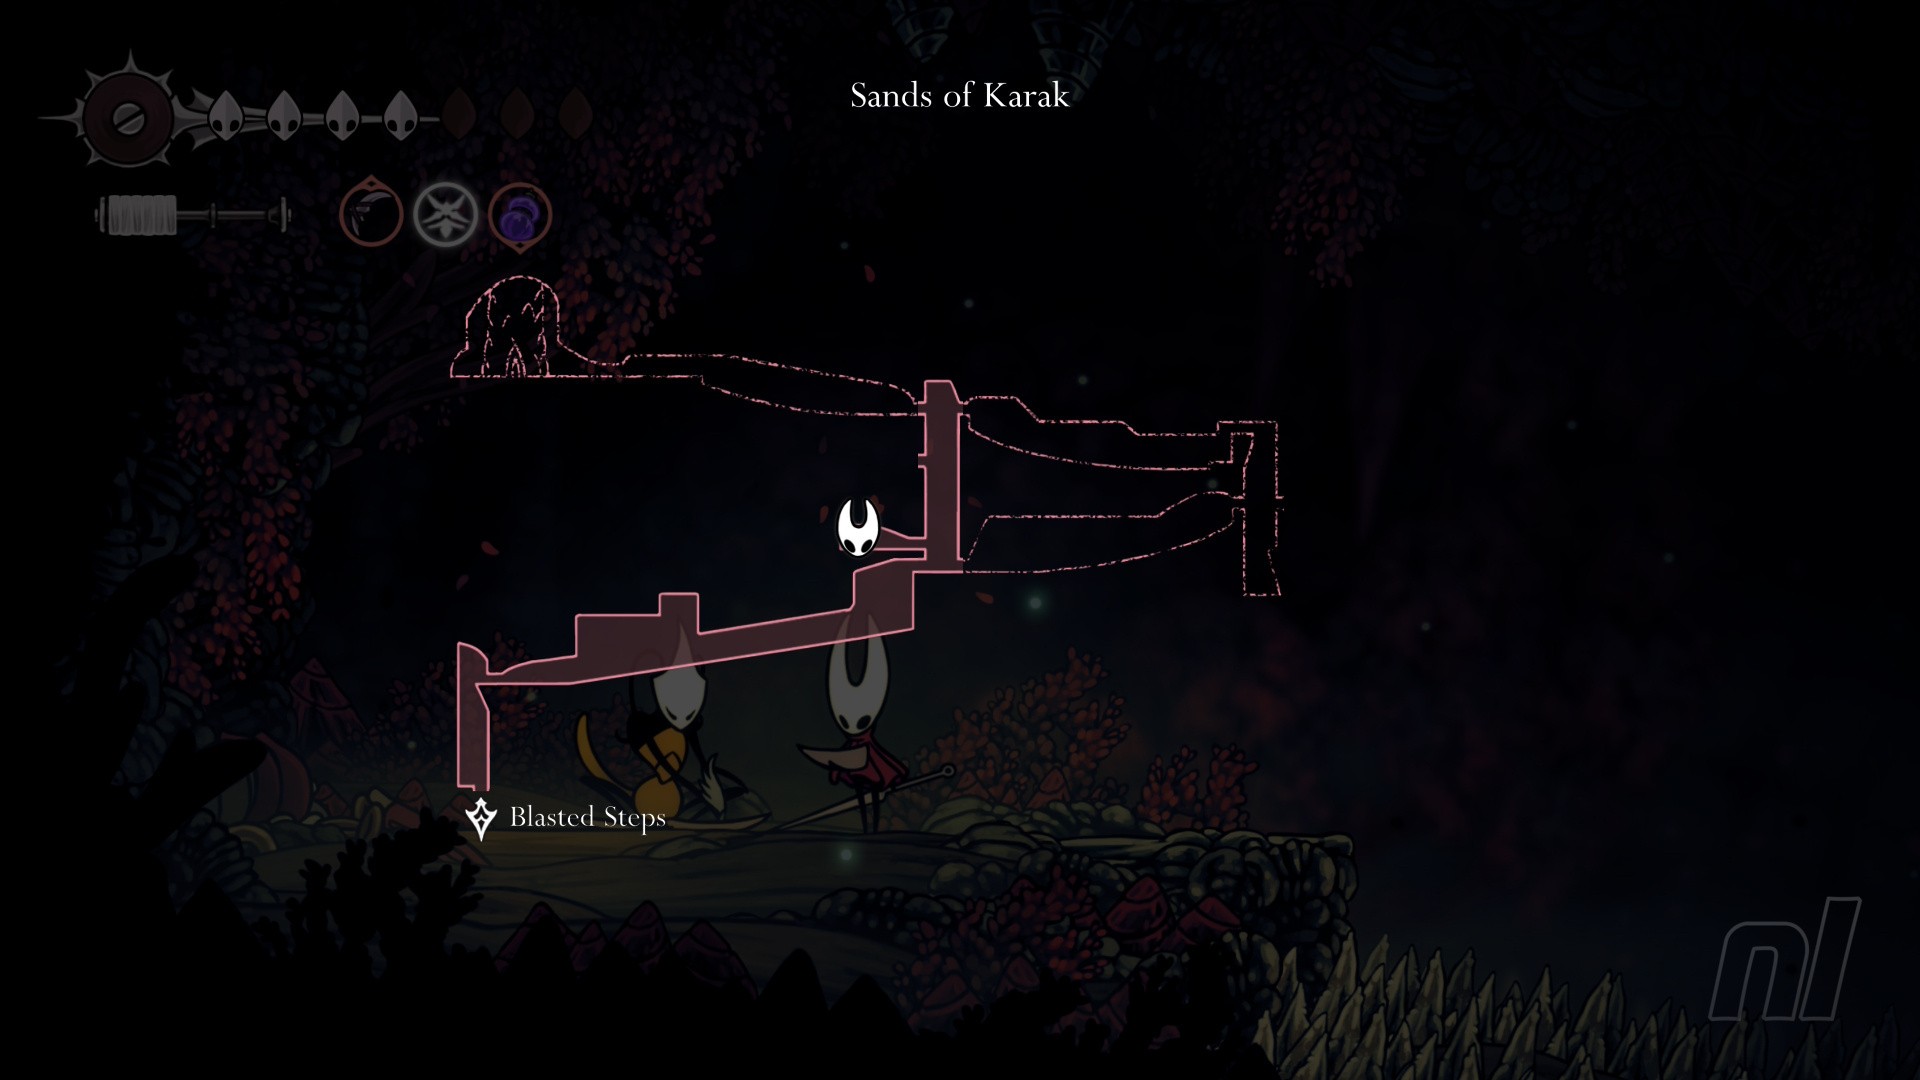
Abandoning the musty halls of The Citadel for a moment, you can head to this desert area just above the Blasted Steps (you need Clawline and Double Jump to get there).
Afterwards, simply follow the path east until you reach a tall room. Here, jump up and go left through the first gap to find the room where Shakra is hiding.
- Sands of Karak Map Cost - 90 Rosaries
Bilewater Map*
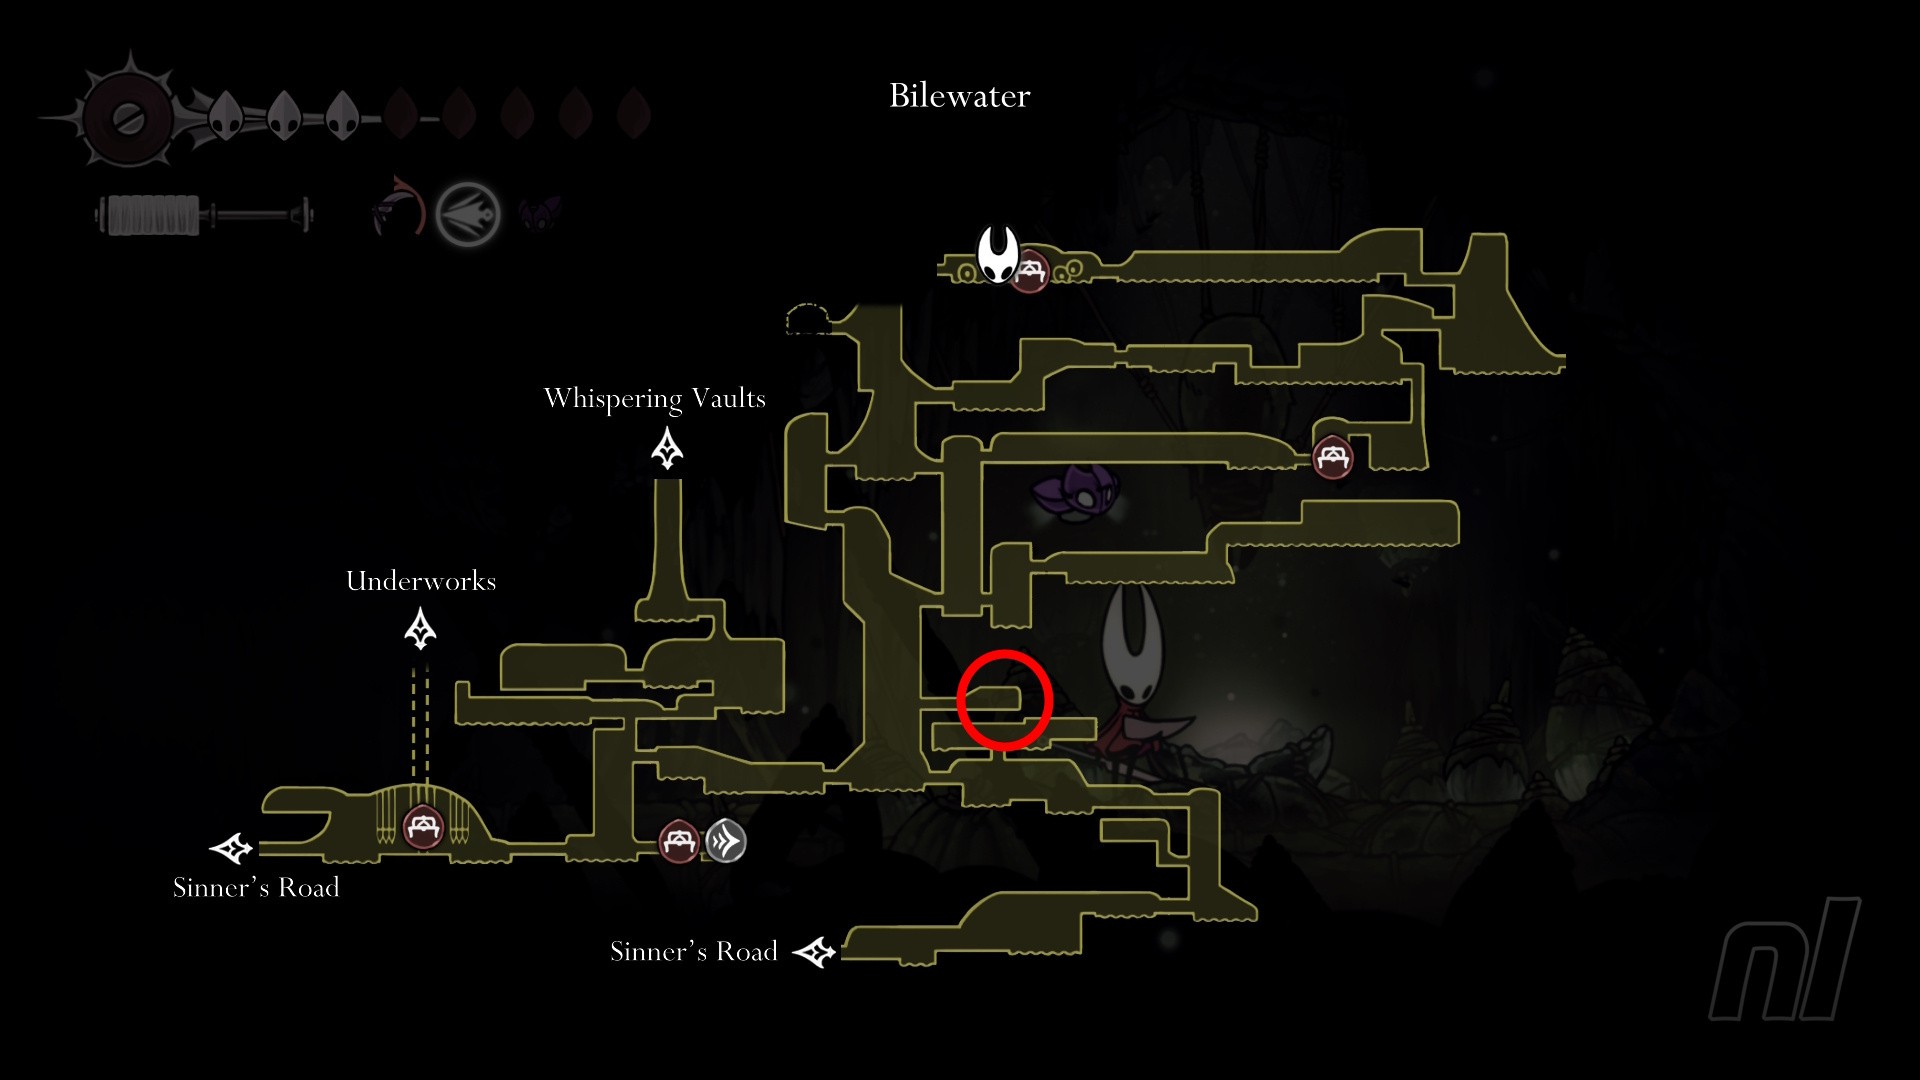
Shakra isn't afraid of any poison or maggots. She's hiding inside a small alcove on the right side of the largest room in the area.
As you're climbing up (and avoiding those giant acid-spewing monsters), pogo across to a cave on the right and enter. She's keeping safe from all of that nastiness here.
This will likely be the last place you find Shakra, meaning you'll also be able to access her Wish.
- Bilewater Map Cost - 90 Rosaries
Putrefied Ducts Map
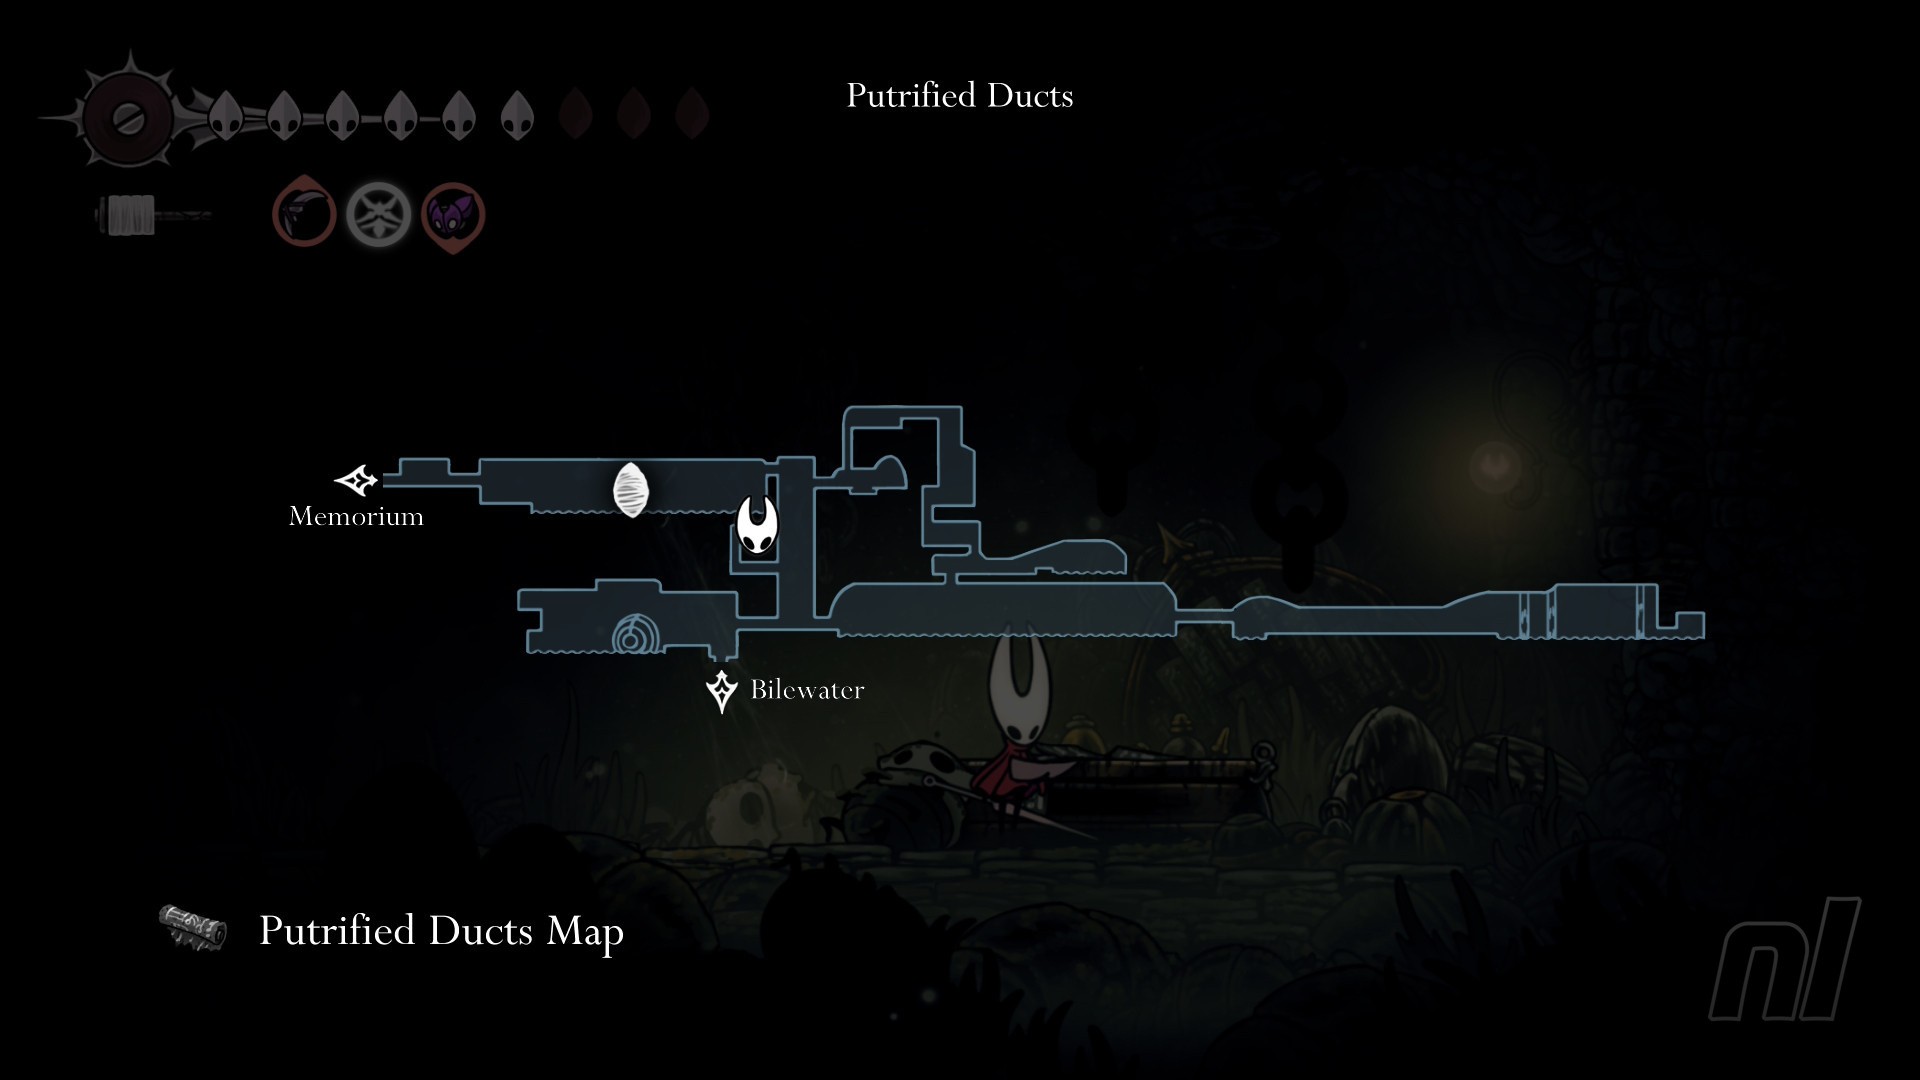
A free map! Finally. But it's very hidden.
From the Memorium entrance, keep heading right through the large room until you enter a second room, a tall one. Make your way down and look out for a breakable wall on the left.
Attack it and walk through the seemingly-empty hallway. You'll get grabbed by an enemy from the ceiling, so just move and you'll shake free.
At the far end, there's a hidden path above, so jump up and then you'll find the map on the desk here.
The Abyss Map (Act 3 Only)
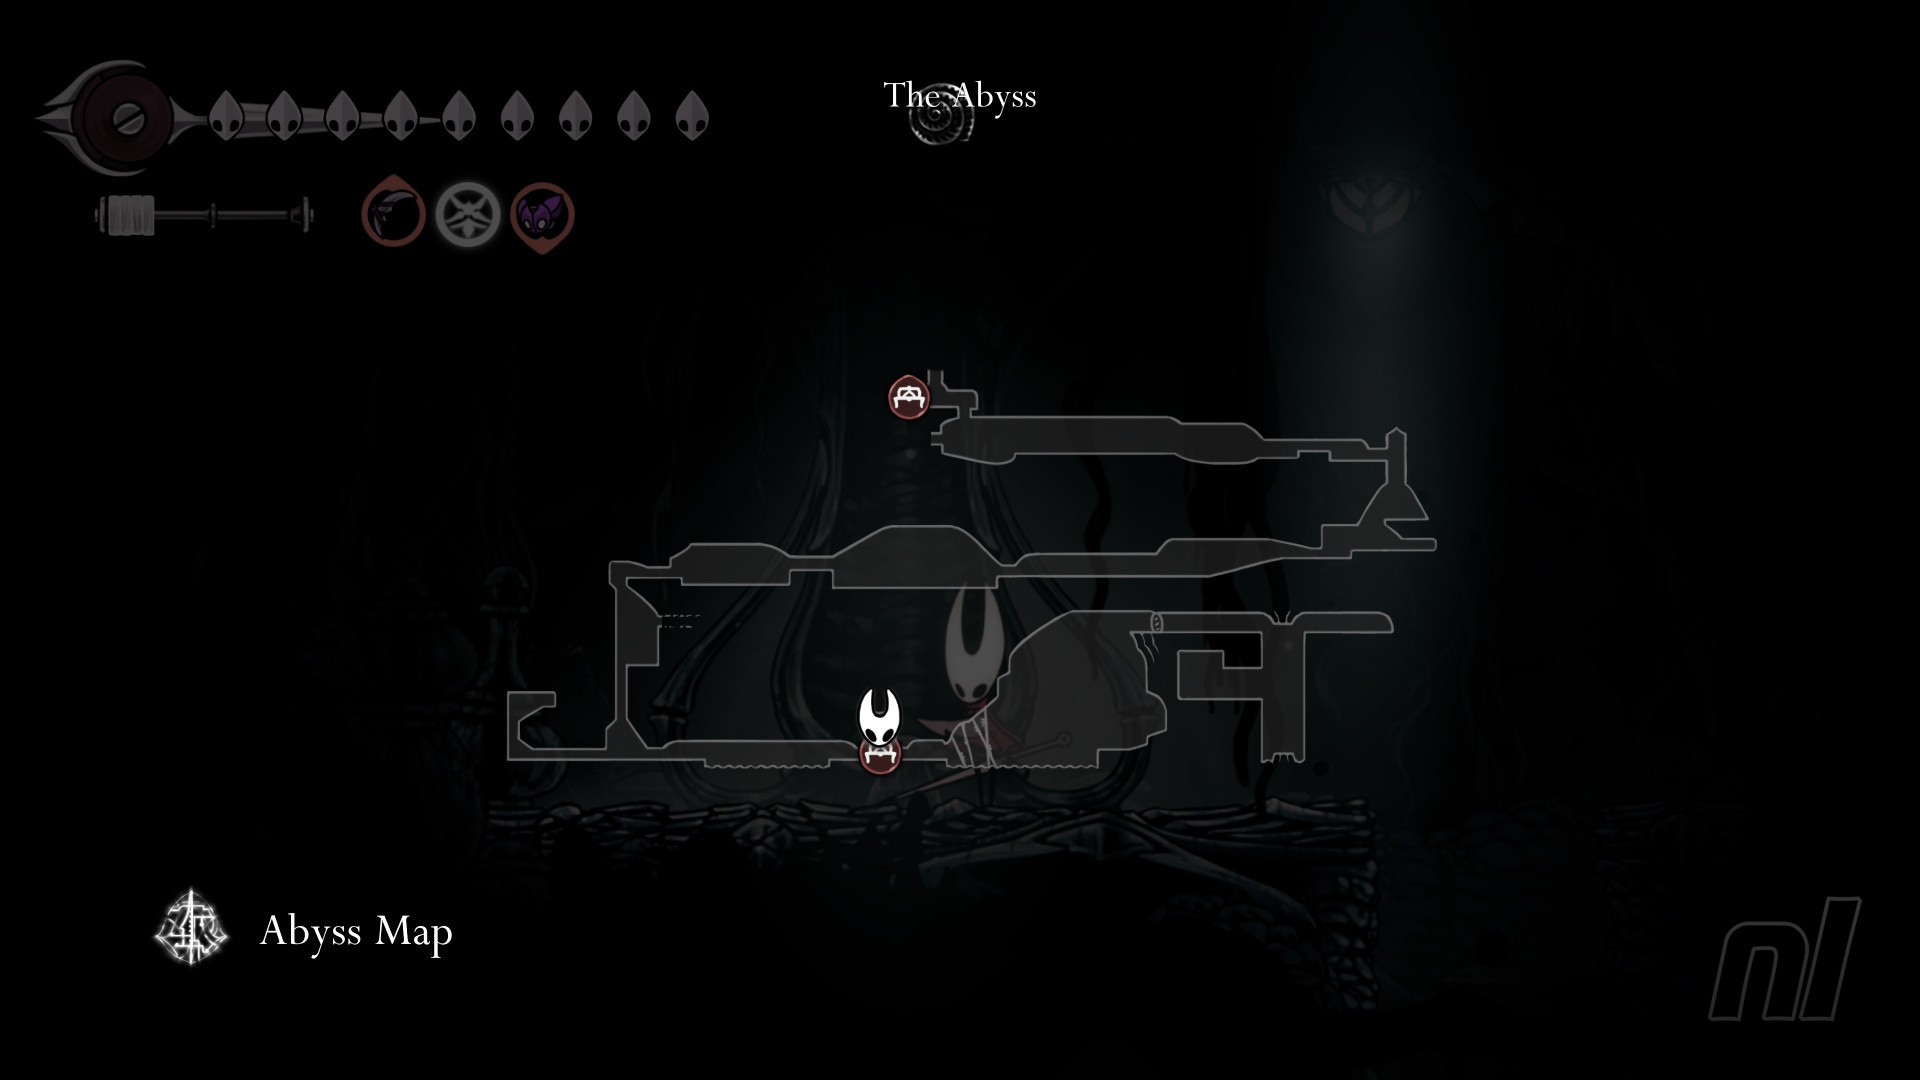
When you reach your first bench in The Abyss (not the one in the diving bell), double jump above it to reach a secret room.
The map is here on the left.
Verdania Map (Act 3 Only)
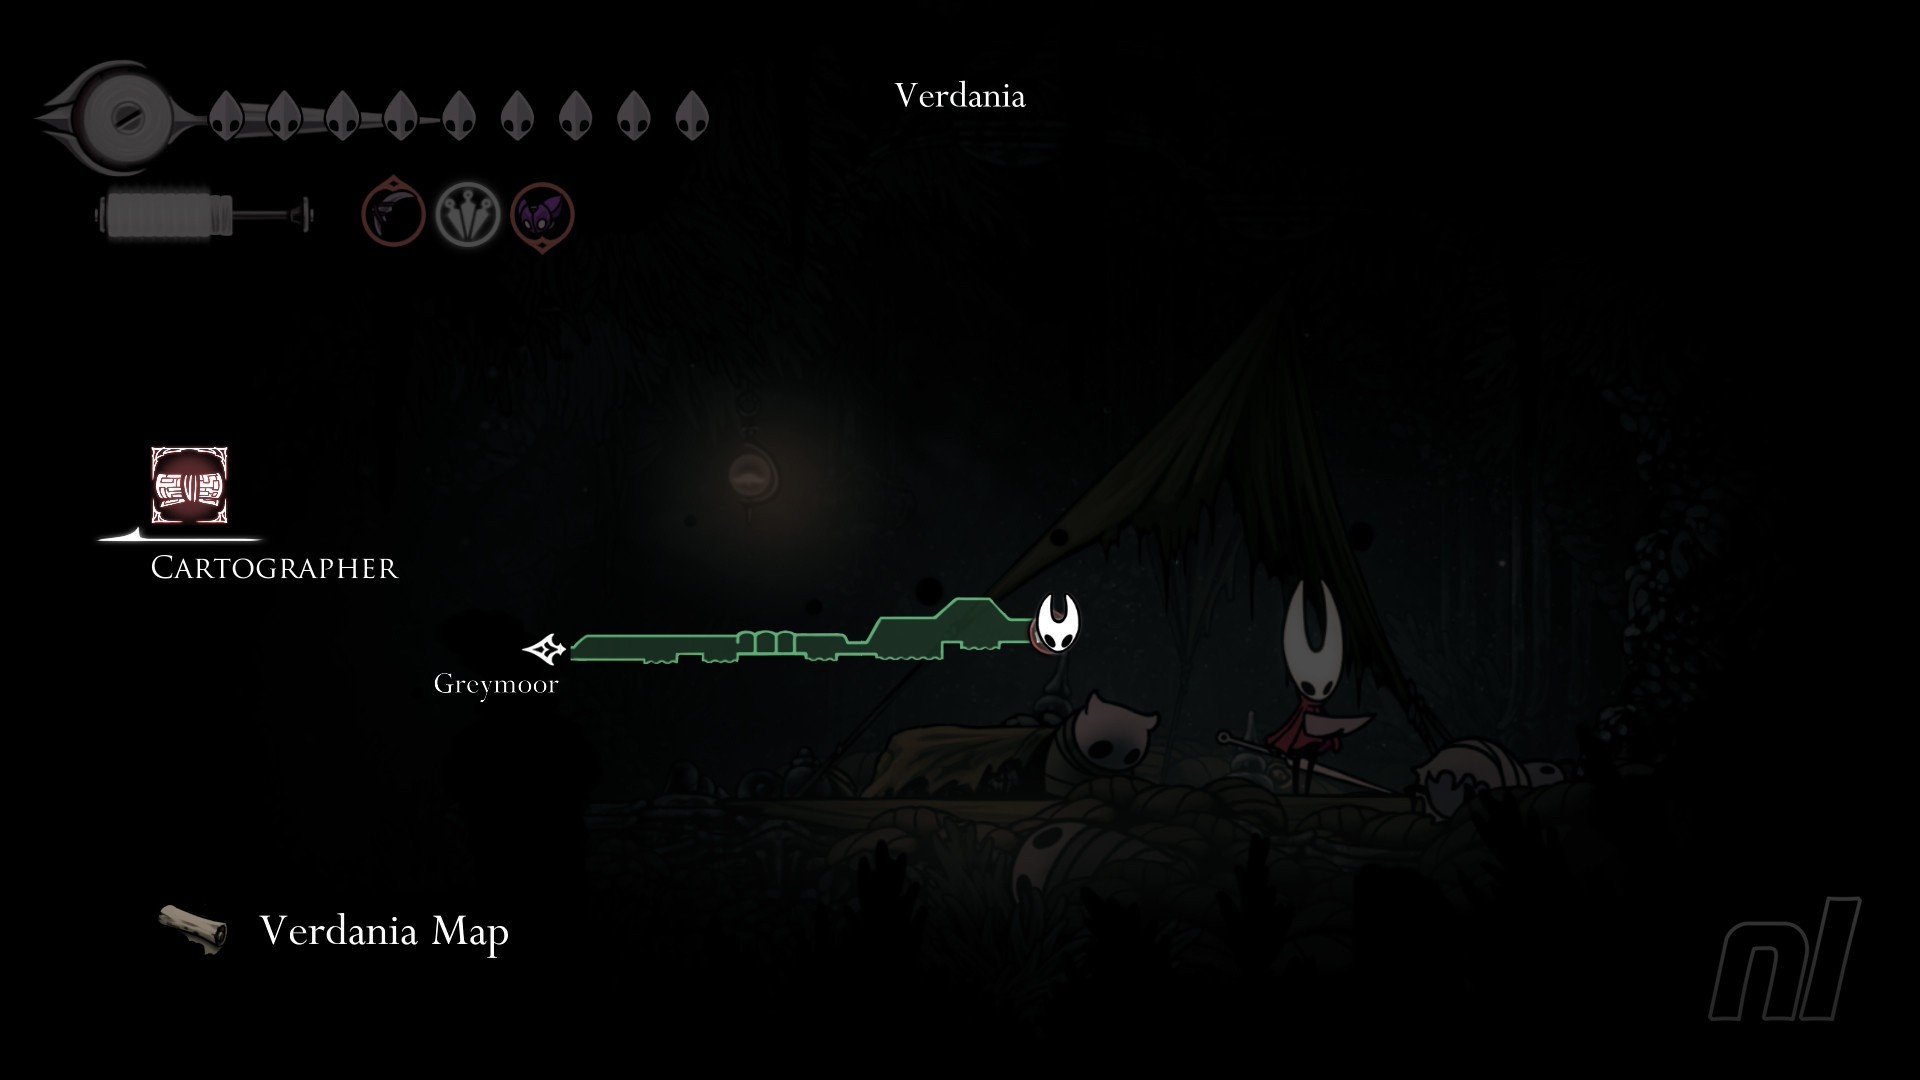
Your final map is located in a secret, tiny, Act 3-exclusive area to the east of Greymoor. Head to the room with the big house in it (right of the entrance) and jump up to a small ledge on the right. A new path has opened up here.
If you saved the Green Prince and spoke to him in the Cogwork Core, then he will be here with one of the Cogwork Dancers. To his right is a secret pathway. Follow the road and the map is at the very end.
Help! I can't find Shakra
No worries if you can't find here, then you'll want to head back to Bone Bottom via the Bellway.
Once there, head right and then jump up some platforms right before you leave the town. You'll see her high up above the town, sketching out her next map.
Eventually, she'll also make camp in Bellhart, in an alcove on the upper-right side, next to the Pinmaster's shop, where you upgrade your Needle.
In Act 3, she remains in Bellhart, defending the homes of the innocent bugs there. And you can still buy pins and maps from her.